Email Setup
Setting up a personal email account in SuiteCRM allows you to view personal mail accounts within the Emails module.
Emails from personal mailboxes are not stored in the SuiteCRM database unless manually imported. See the Emails module documentation for more information.
Individual users can set up their own personal accounts. Administrators can set up personal accounts for other users from the User Management section of the Admin panel.
User Profile Email Settings
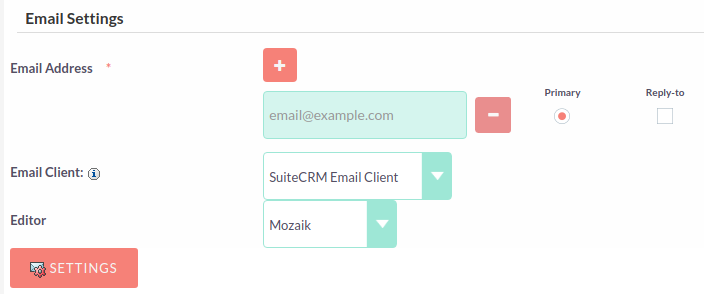
Open the user profile and scroll to the bottom of the main User Profile tab to view mail settings. Note that if you are configuring mail settings for another user, you will need to select Edit from the Actions menu to see these settings.
-
Email Address - Add the email address(es) for your SuiteCRM account. Click + to add more addresses. Where you have more than one email address, you can specify which is the main address for your account using the Primary radio button. You can also specify which account to use as the Reply-to account.
-
Email Client - This setting controls which editor is used to compose and send mail when you click on an email link in SuiteCRM, for example an email address on a contact or account record.
-
SuiteCRM Email Editor - The SuiteCRM Emails module editor will be used
-
External Email Editor - With External email editor set, mail links in SuiteCRM will open in whichever email client you have set to open
mailto://links, for example Outlook or Thunderbird
-
-
Email Editor - This allows you to set the editor used when creating and editing email templates and also within the Campaigns module. Note that the Email Editor setting does not affect the SuiteCRM Emails module Compose view. This setting is not currently user-definable. Available options are Mozaik, TinyMCE and Direct HTML.
Adding A Personal Mail Account
Click the SETTINGS button at the bottom of the main User Profile tab to add a personal mail account.
Select the Mail Accounts Tab and click ADD under Mail Accounts to set up your incoming mail account.
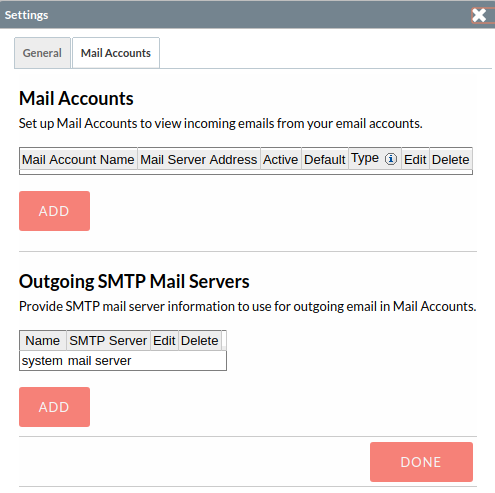
Complete the required details for the account in the dialog which appears. You will need the username and password for the account you are adding, plus the mail server address. The mail protocol supported by SuiteCRM is IMAP. You may also need to set the Mail Server Port if this differs from the default IMAP setting. Your system administrator should be able to provide you with these settings.
If your email provider uses two-step verification and does not support OAuth, you may need to generate an app password to use here instead of your regular account password. See App Passwords for details.
Once entered, you can verify your mail settings by clicking TEST SETTINGS to test the connection to the account.
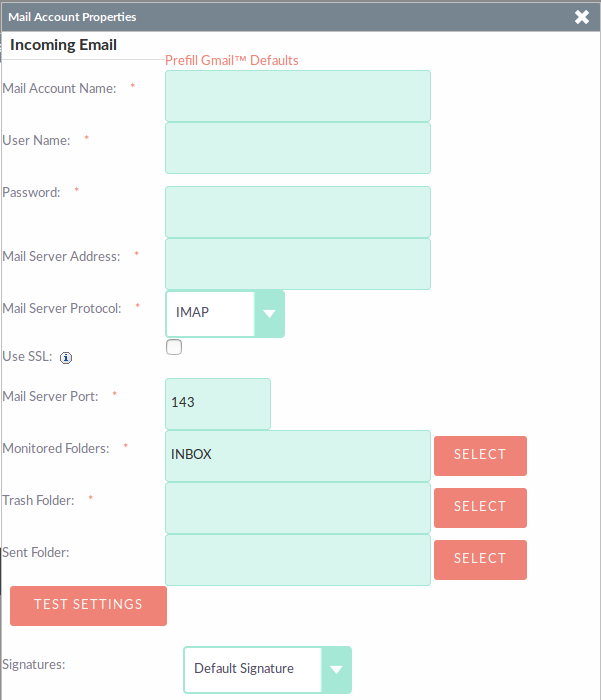
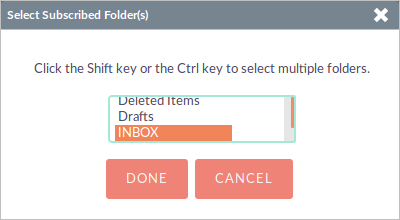
Monitored Folders: are the folders which are checked for new (unread) mail. You must specify an Inbox and a Trash folder here. Enter the folder names or click SELECT to connect to the mail server and select the relevant folder(s) from the popup dialog.
Signatures: Select a signature for this account. This will be automatically added to the email body when composing an email using the Emails module. If you wish to create a new signature, you will need to do this from the General tab and then select it here. This will override the default setting on the General tab.
Complete the Outgoing Email settings for the user account.
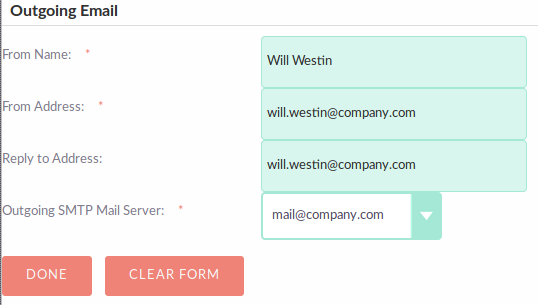
Click DONE to save the account settings and return to the Mail Accounts tab.
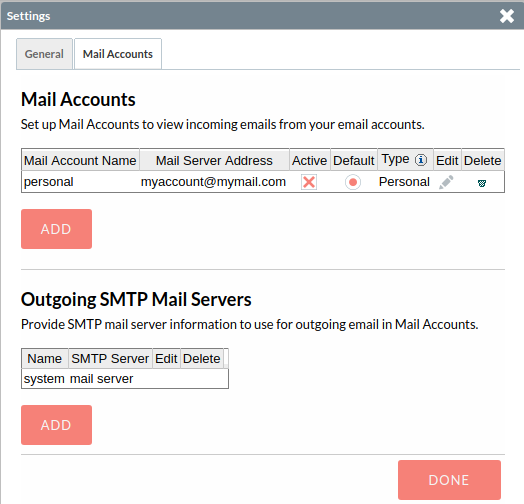 If you have more than one account configured you can set the default account to appear when you open the Emails module. Accounts set as active will be available to select.
Edit personal mail account settings by clicking the pencil icon in the Edit column.
User Mail Settings - General Tab
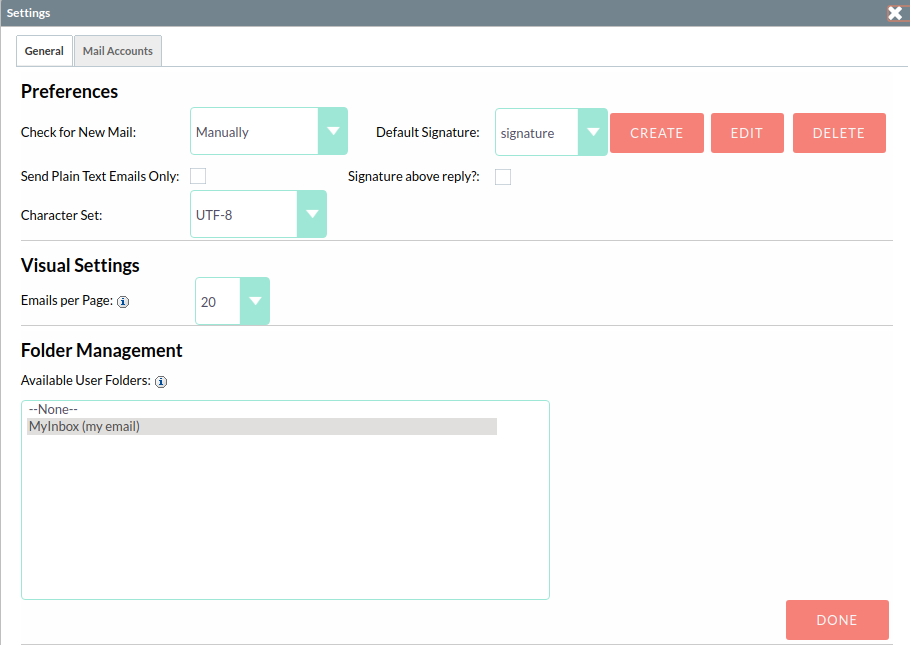
There are further settings for mail on the General Tab:
-
Check for New Mail - Here you can specify a time interval to automatically check for new mail in your account’s monitored folders. The default setting is to check for mail manually, using the Check Mail button in the Emails List View.
-
Default Signature - Option to specify the default signature that will be added to the email body when a new email is composed. Click CREATE to add a new one or select one from the list. Existing signatures can be edited and deleted here.
-
Folder management - Select the folder(s) which will be available to view from the Emails module. This list will show all the monitored folders from all the mail accounts to which you have access. Use ctrl+click to select more than one folder.
Click DONE to save your settings. A confirmation dialog will appear.
You should now be able to view your emails in the Emails module.