Homepage and Dashboards
The Homepage is the first page displayed to you once you have logged in. It has various elements that can be used and configured, such as Dashlets and Dashboards.
Dashlets
Dashlets are user-configurable sections displayed on the Homepage that give you a quick overview of your records and activity immediately after login. You can think of Dashlets as widgets — each one displaying a specific set of information at a glance. This is useful as it reduces the number of clicks required to view and manage data.
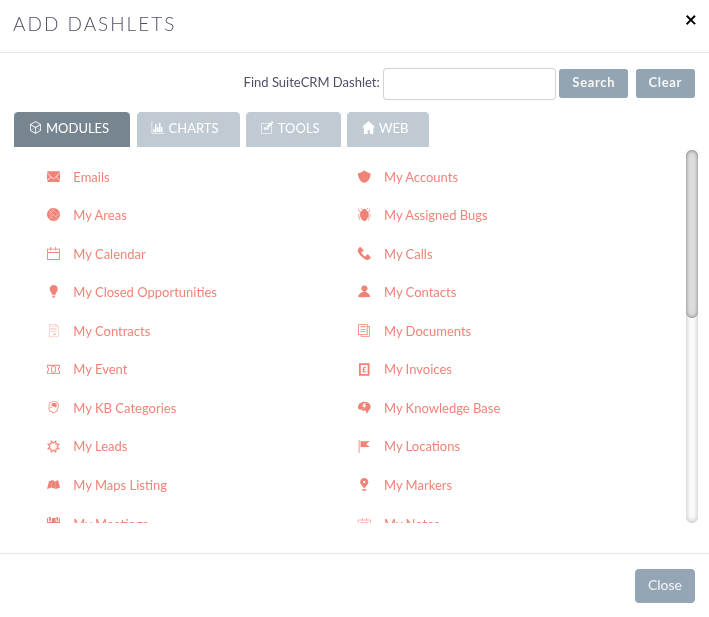
When adding Dashlets, the Add Dashlets pop-up is organised into four tabs:
-
Modules: Lists Dashlets for each of the existing modules in your SuiteCRM instance, such as Contacts or Accounts. These allow you to add module-specific records directly on your Homepage.
-
Charts: Contains a selection of out-of-the-box chart Dashlets, giving you a visual summary of your data.
-
Tools: Contains a range of utility Dashlets. Two particularly useful ones are JotPad and Activity Stream, both of which are described in the sections below.
-
Web: Allows you to embed external web pages or content directly into a Dashlet on your Homepage.
Adding Dashlets
To add a Dashlet, click the Add Dashlets button from the Actions drop-down on the Homepage. This will open the Add Dashlets pop-up, which allows you to select from a range of out-of-the-box Dashlets.
Simply click on a Dashlet name to add it to your Homepage. The pop-up will remain open after each selection, allowing you to add multiple Dashlets in one go. Once you have added all the Dashlets you need, close the pop-up to return to your Homepage.
Removing Dashlets
To remove a Dashlet, click the X icon in the top-right corner of the Dashlet you wish to remove. This will immediately remove it from your Homepage. If you change your mind, you can re-add it at any time using the Add Dashlets pop-up.
Modifying Dashlets
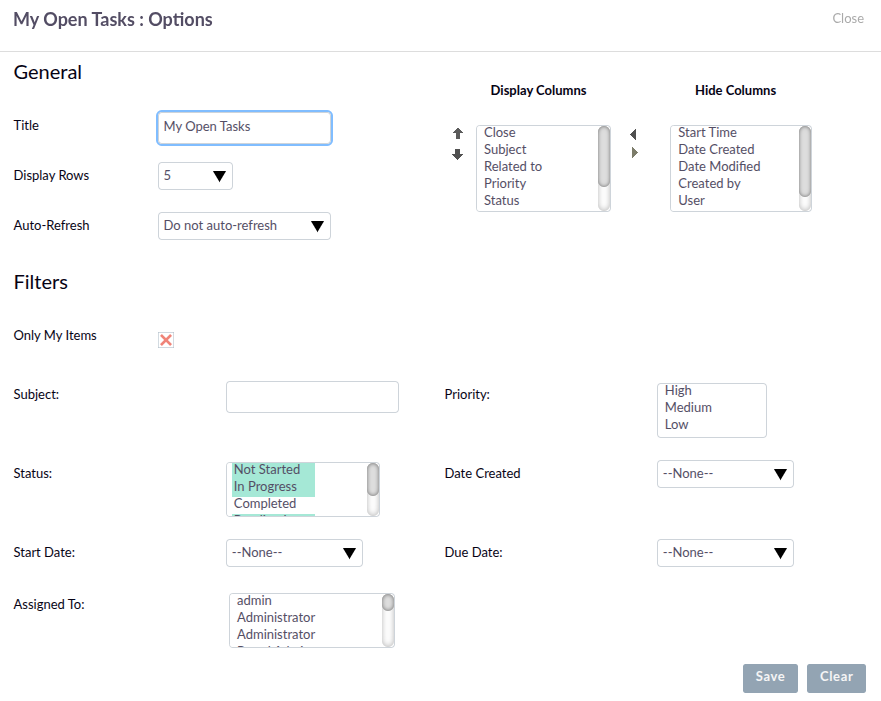
To modify a Dashlet, click the Cog icon on the Dashlet you wish to configure. This will open a configuration pop-up containing all available options for that Dashlet. The options are split into two sections: General and Filters.
General:
-
Title: Edit the display name of the Dashlet as it appears on your Homepage.
-
Display Rows: Set the number of records shown in the Dashlet at one time.
-
Auto-Refresh: Configure how frequently the Dashlet automatically refreshes its data. By default this is set to Do not auto-refresh.
-
Display Columns / Hide Columns: Select which columns are visible within the Dashlet. Columns can be moved between the Display and Hide lists, and the up/down arrows allow you to reorder the displayed columns.
Filters:
-
Only My Items: When checked, the Dashlet will only display records assigned to you.
-
Subject: Filter records by a specific subject keyword.
-
Priority: Filter by task priority: High, Medium, or Low. Multiple values can be selected.
-
Status: Filter by task status, such as Not Started, In Progress, or Completed. Multiple values can be selected.
-
Date Created: Filter records based on when they were created.
-
Start Date / Due Date: Filter records by their start or due date range.
-
Assigned To: Filter records by the user they are assigned to.
Once you have made your changes, click Save to apply them, or Cancel to discard any changes and keep the current configuration.
Some Dashlets require the Homepage to be reloaded for changes to take effect.
The columns and filters available in a Dashlet configuration will vary depending on the module the Dashlet is associated with, and can be configured by a system administrator.
Rearranging Dashlets
Dashlets can be freely rearranged on your Homepage by dragging and dropping them into your preferred position. This allows you to prioritise the information most relevant to your role and workflow.
JotPad
JotPad is a simple notepad Dashlet that can be added to your Homepage via the Tools tab when adding Dashlets. It provides a free-text area where you can jot down notes, reminders, or any information you want to keep easily accessible.
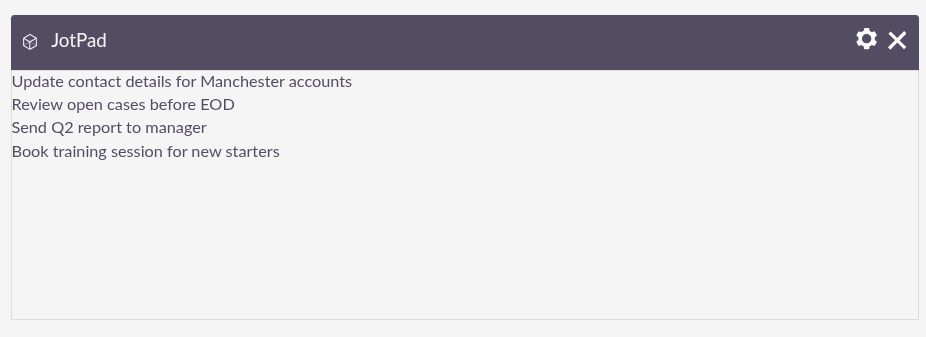
Some key things to note about JotPad:
-
Persistent: Any notes you save in JotPad will remain between sessions, so your notes will still be there the next time you log in.
-
Personal: JotPad notes are saved against your user account only and are not visible to other users.
-
Editable: You can update or overwrite your notes at any time by simply typing in the JotPad area.
-
Multiple instances: You can add more than one JotPad Dashlet to your Homepage if needed, for example to keep different categories of notes separate across different Dashboard tabs.
JotPad is particularly useful for keeping track of quick reminders or temporary information without having to leave SuiteCRM or switch to an external application.
Activity Stream
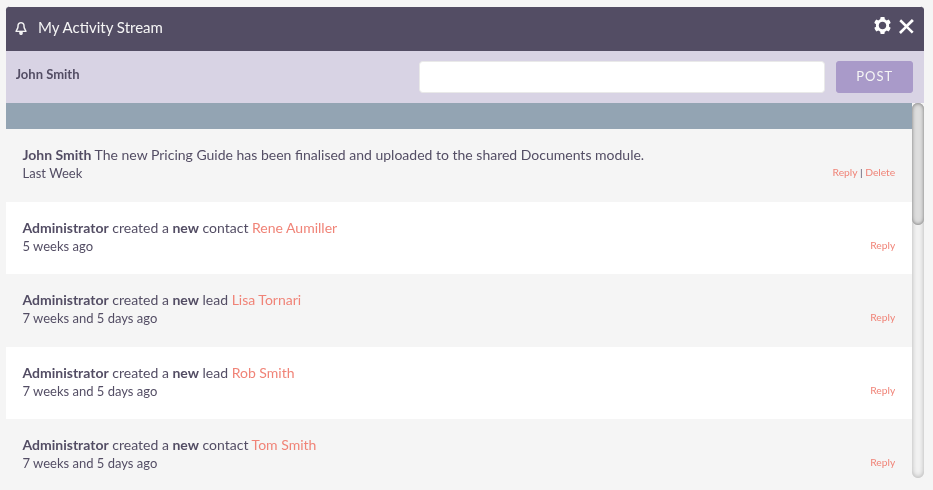
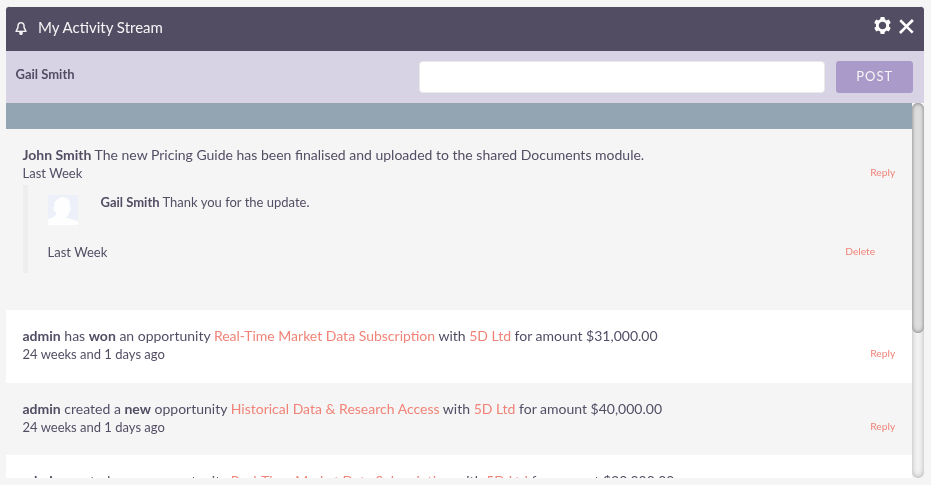
The Activity Stream is a great way of keeping track of your colleagues' interactions with SuiteCRM. It functions similarly to a social media feed, displaying a real-time log of activity across your organisation.
By default, the Activity Stream displays recent updates for the Contacts, Leads, Opportunities, and Cases modules.
Viewing and Replying to Updates
The Activity Stream is displayed as a feed of posts, each showing what action was taken, by whom, and when. You can respond to any update by clicking the Reply link on the right-hand side of the post. Your reply will appear beneath the original post with a timestamp, making it easy to follow the thread of a conversation.
Deleting Posts
If you need to remove one of your own posts from the Activity Stream, you can do so by clicking the Delete link on the post. This will remove it from the feed for all users.
Posting a Message
The Activity Stream can also be used as an internal messaging tool, allowing you to broadcast a message to all users in your organisation. To post a message, simply type in the text field at the top of the Activity Stream and click Post. Your colleagues will be able to see your message and respond using the Reply link, with their response appearing beneath your post along with a timestamp.
Dashboards
Dashboards are tabbed pages on your Homepage that house your Dashlets, allowing you to organise them into logical groupings. You can think of Dashboards as containers for your Dashlets. They are configurable per user, meaning any changes you make will only affect your own view.
Adding a Dashboard
To add a new Dashboard, click the Add Tab button from the Actions drop-down on the Homepage.
This will open the Add Tab pop-up, where you can specify the following:
-
Name: Enter a name for your new Dashboard tab.
-
Columns: Choose how many Dashlet columns the Dashboard will display. You can opt for one, two, or three columns.
Once you have filled in the details, click Add Tab to create the Dashboard, or Cancel to discard your changes. The new tab will then appear in the tab list on your Homepage, ready for you to populate with Dashlets.
Removing a Dashboard
To remove a Dashboard, click Edit Tabs from the Actions drop-down on the Homepage. Click the - icon next to the tab you wish to remove. You will be prompted to confirm the deletion before the tab is removed. This action only affects your own Dashboard and will not impact any other users.
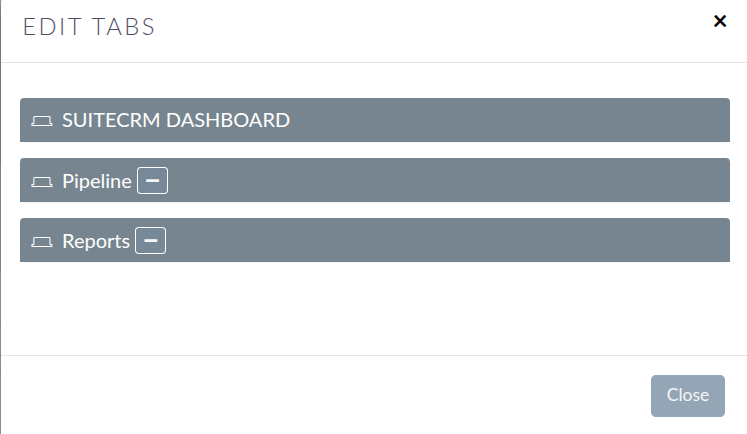
The SuiteCRM Dashboard tab is the default tab and cannot be removed. You can, however, configure which Dashlets are displayed on it.