Managing Your Profile
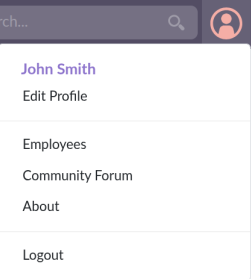
There are many configuration options available to you once you have logged into SuiteCRM. You can view and modify your preferences by hovering over the user icon in the top right section of the navigation menu and clicking Edit Profile.
User Profile Tab
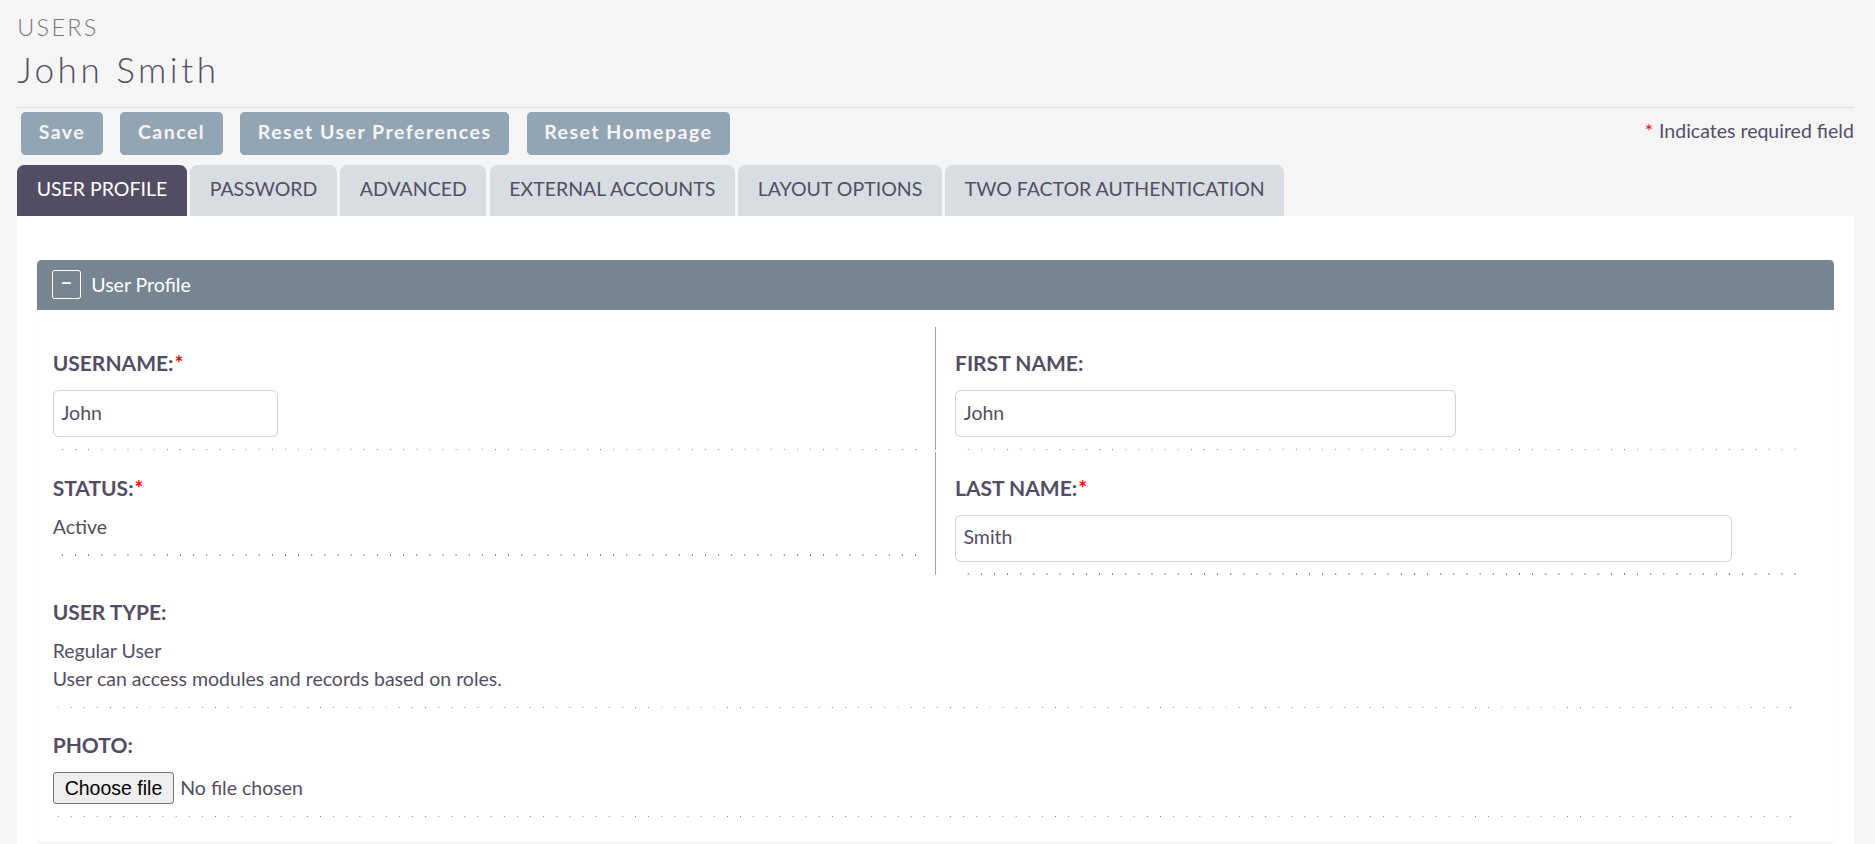
Once you have clicked to access your preferences, you will be taken to the User Profile tab which gives an overview of your credentials such as username, first name, last name, and title. Here you can also enter your employee information and update your email settings.
Personal Email Account Settings
Setting up a personal email account in SuiteCRM allows you to view personal mail accounts within the Emails module.
-
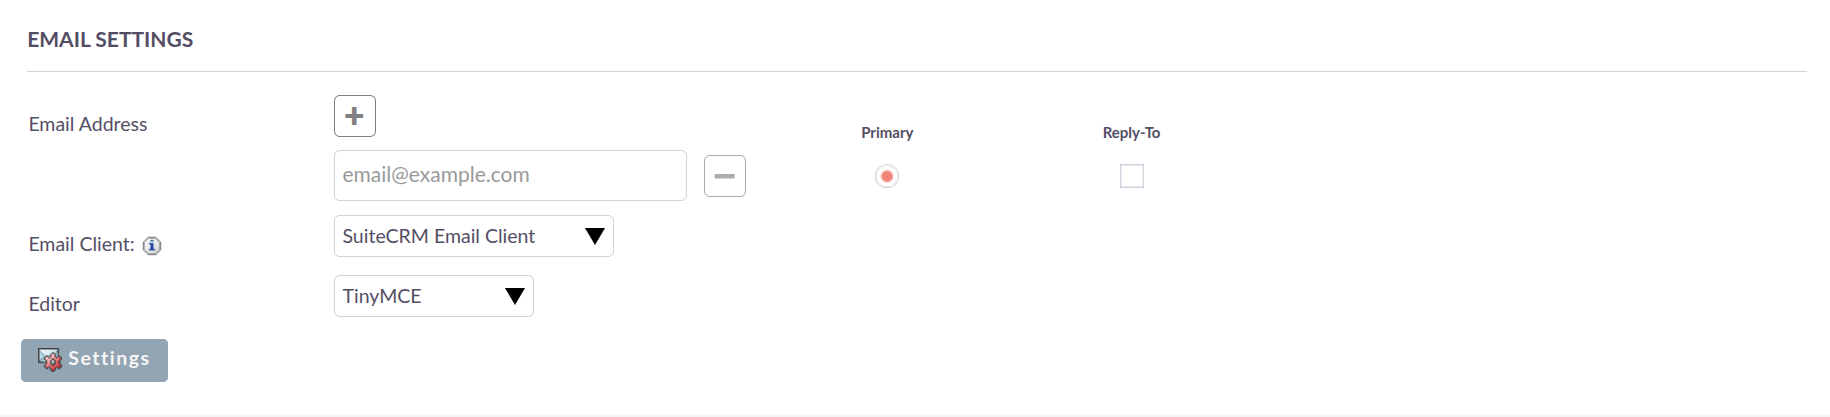
Email Address: Add the email address(es) for your SuiteCRM account. Click + to add more addresses. Where you have more than one email address, you can specify which is the main address using the Primary radio button. You can also specify which account to use as the Reply-to account.
-
Email Client: This setting controls which editor is used to compose and send email when you click on an email link in SuiteCRM, for example an email address on a Contact or Account record.
-
SuiteCRM Email Editor: The SuiteCRM Emails module editor will be used.
-
External Email Editor: Mail links in SuiteCRM will open in whichever email client you have set to open mailto:// links, for example Outlook or Thunderbird.
-
-
Editor: This allows you to set the editor used when creating and editing email templates and within the Campaigns module. Available options are Direct HTML and TinyMCE.
-
Settings: There are further settings for mail. You can access them by clicking the Settings button:
-
Check for New Mail: Specify a time interval to automatically check for new mail in your account’s monitored folders. The default setting is to check for mail manually using the Check Mail button in the Emails List View.
-
Default Signature: Specify the default signature that will be added to the email body when a new email is composed. Click Create to add a new one or select one from the list. Existing signatures can be edited and deleted here.
-
Folder Management: Select the folder(s) which will be available to view from the Emails module. This list will show all monitored folders from all mail accounts to which you have access. Use Ctrl+click to select more than one folder.
-
Click Done to save your settings. A confirmation dialogue will appear.
Password Tab
Clicking on the Password tab will allow you to change your user account password. To change your password, you will need to specify the current password, a new password, and confirm the new password. It is recommended that passwords are secure.

Advanced Tab
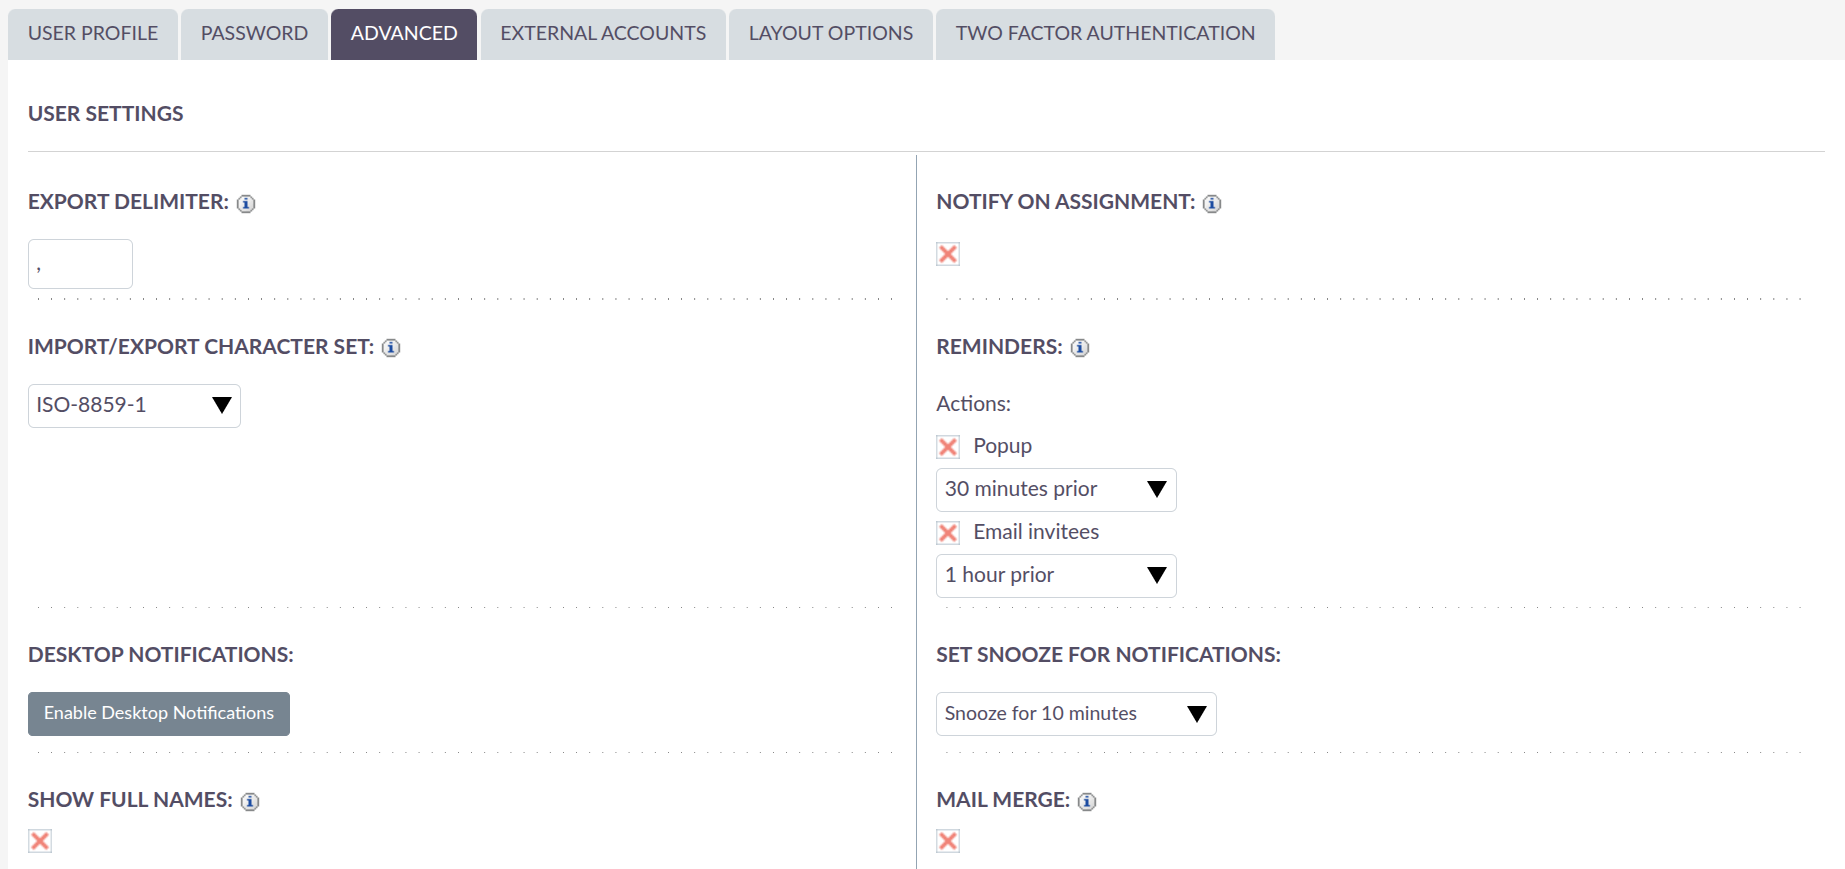
The Advanced tab allows you to modify user preferences that you set during the User Wizard process. This gives you the ability to change any of your user preferences if there were any mistakes or if you require amending them at a later date.
Two-Factor Authentication
The Two-Factor Authentication tab displays the current status of your 2FA configuration. For full setup, login, and recovery code instructions see the Two-Factor Authentication page.
Layout Options
The Layout Options tab allows you to personalise the appearance and behaviour of your SuiteCRM interface. Changes made here are specific to your user account and will not affect any other users.
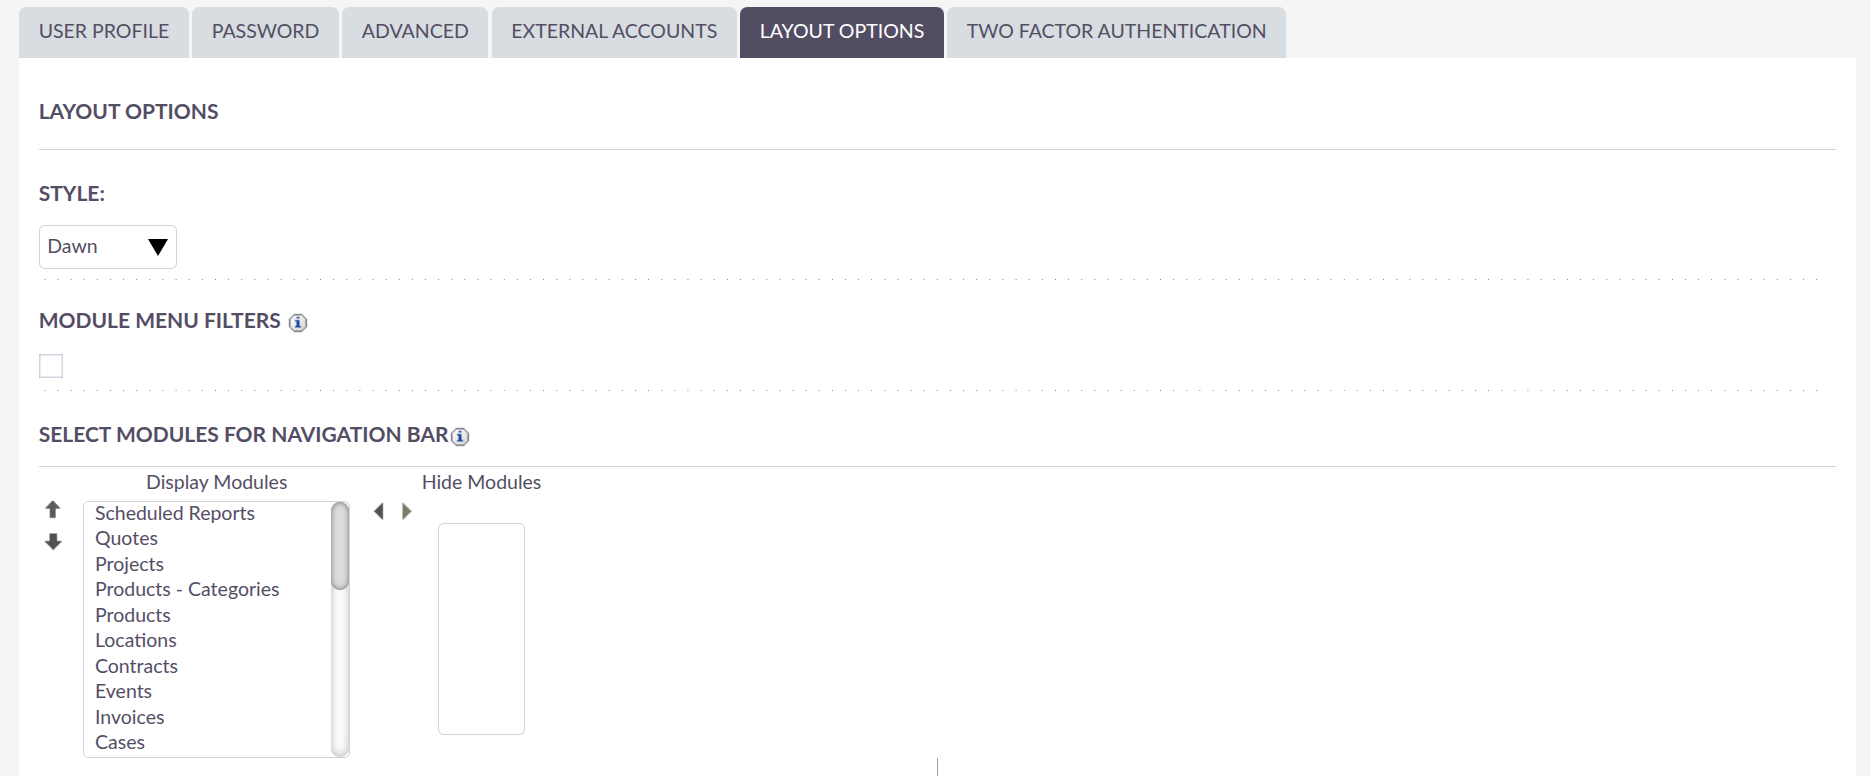
The following settings are available:
-
Style: Select the visual theme you wish to use for your SuiteCRM interface. The available theme is Dawn.
-
Module Menu Filters: When enabled, the modules displayed in the navigation bar will reflect the group tab configuration set up by your system administrator, allowing you to browse modules by group. When disabled, all modules will be listed individually in the navigation bar regardless of any group tab configuration.
-
Select Modules for Navigation Bar: This setting allows you to control which modules appear in your Top Navigation Bar. Modules listed under Display Modules will be visible in the navigation bar, while those listed under Hide Modules will not. You can move modules between the two lists using the arrow buttons, and reorder the displayed modules using the up and down arrows. This is useful if you want to prioritise the modules you use most frequently and remove those you don’t need.
-
Sort Modules Alphabetically: When enabled, the modules displayed in your navigation bar will be sorted in alphabetical order. When disabled, modules will appear in the order you have specified in the Select Modules for Navigation Bar setting above.
-
Sub-panel Pagination Type: Controls how records are paginated within sub-panels. The available options are Pagination (traditional page navigation) or Load More (a continuous scroll style where additional records are loaded on demand). Select whichever option suits your preferred way of working.
-
List View Pagination Type: Controls how records are paginated within List Views across all modules. As with the sub-panel setting, the available options are Pagination or Load More.
-
Pop Up Record List Pagination Type: Controls the pagination style used in pop-up record selection windows, such as when linking an existing record to another via a sub-panel. The available options are the same as above.
-
Show Collapsed Sub-panel Hint: When enabled, a hint will be displayed on collapsed sub-panels to indicate that related records exist, even when the sub-panel is not expanded. This setting applies to modules that are still displayed in the legacy view. For modules using the modern SuiteCRM interface, this setting has no effect as the related record count is displayed on the sub-panel tile by default.
-
Sub-panel Tabs: When enabled, sub-panels within the Relationships section of a record are grouped into tabs rather than displayed as individual tiles. As with the setting above, this applies only to modules that are still displayed in the legacy view. For modules using the modern SuiteCRM interface, sub-panels are displayed as individual tiles within the Relationships grid and this setting has no effect.
Once you have made your changes, click Save to apply them. Your updated layout preferences will take effect immediately.
Some layout options may be restricted or pre-configured by your system administrator and may not be available for individual users to change.
Resetting Your Preferences
You can reset your user preferences to the system default by clicking the Reset User Preferences button on your profile.

Clicking the button will prompt you to confirm, with the message: "Are you sure you want to reset all of your user preferences? Warning: This will also log you out of the application." You can then click OK or Cancel to action appropriately. If you select OK, you will be logged out and will need to log back in.
Resetting Your Homepage
You can reset your Homepage to the system default by clicking the Reset Homepage button. This will reset both Dashlet and Dashboard preferences and layouts to the system default.

Clicking the button will prompt you to confirm with the message: "Are you sure you want to reset your Homepage?" You can then click OK or Cancel to action appropriately.