A personal inbound email account allows you to view emails from your personal mailbox within the SuiteCRM Emails module. Emails from a personal inbound account are not automatically stored in SuiteCRM. They must be manually imported if you wish to log them against a record.
To set up a personal inbound email account:
-
From the Navigation Bar, hover over your username in the top-right corner of the screen and click Edit Profile.
-
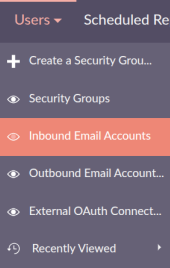
Hover over Users in the top navigation bar and click Inbound Email Accounts.
-
Hover over Inbound Email Accounts and click New Personal Account.
-
The creation screen is divided into three sections. Complete each section as follows:
-
Name: A descriptive name for this account, for example "My Work Email."
-
Type: This will be set to Personal automatically and cannot be changed.
-
Status: Set to Active by default. This controls whether the account is actively monitored.
-
Owner: This will be pre-populated with your username.
-
Auth Type: Select the authentication type required by your mail server. Options include Basic Auth (username and password) and OAuth.
-
Mail Server Address: Enter the address of your incoming mail server (IMAP server).
-
Protocol: The protocol is set to IMAP and cannot be changed, as SuiteCRM uses IMAP for inbound email.
-
Mail Server Port: Enter the port number used by your incoming mail server. The default value is 143.
-
Use SSL: Check this box if your mail server requires a secure SSL connection.
-
User Name: Enter the username for your email account, typically your full email address.
-
Password: Enter the password for your email account.
-
Monitored Folders: Select the mail folders that SuiteCRM should monitor for incoming emails, typically your Inbox. Click Select to connect to your mail server and choose the relevant folders from the pop-up.
-
Trash Folder: Select the folder used as your email trash or deleted items folder. Click Select to choose from the available folders.
-
Sent Folder: Select the folder used to store sent emails. Click Select to choose from the available folders.
-
Connection String: This is an optional field. Leave blank unless you have been advised by your system administrator to use a specific connection string.
-
Email Body Filter Type: Controls how the email body is searched within SuiteCRM. The default setting is Multi Word Search, which is suitable for most users.
-
Outbound Email Account: Select the outbound email account to be used when replying to emails received in this inbound account. Click the selector icon to search for and link an existing outbound account.
-
Signature: Select the email signature to be used when composing emails from this account. The Default Signature will be used unless another is selected.
-
"From" Name: The name that will appear in the From field when sending emails from this account.
-
"From" Address: The email address that emails will be sent from.
-
"Reply-To" Name: The name that will appear in the Reply-To field, if different from the From Name. This is optional.
-
"Reply-To" Address: The email address that replies will be directed to, if different from the From Address. This is optional.
-
Once all server details have been entered, click Test Connection Settings in the top-right corner of the screen to verify that SuiteCRM can connect to your mail server successfully before saving.
-
Click Save to store the account settings.
If you are unsure of the mail server settings required for your email account, contact your system administrator or refer to the documentation provided by your email provider. If your organisation uses OAuth-based authentication such as Microsoft 365 or Google Workspace, your system administrator will need to configure the OAuth connection before you can complete this setup.