Running the UI installer
The following documentation is for SuiteCRM Version 8+; to see documentation for Version 7, click here.
1. Intro
This page explains how to use the UI installer for SuiteCRM.
Before going through the steps on this page, please go through the Downloading & Installing guide.
2. Pre-Install Page
Here you will see the Pre Install Check page.
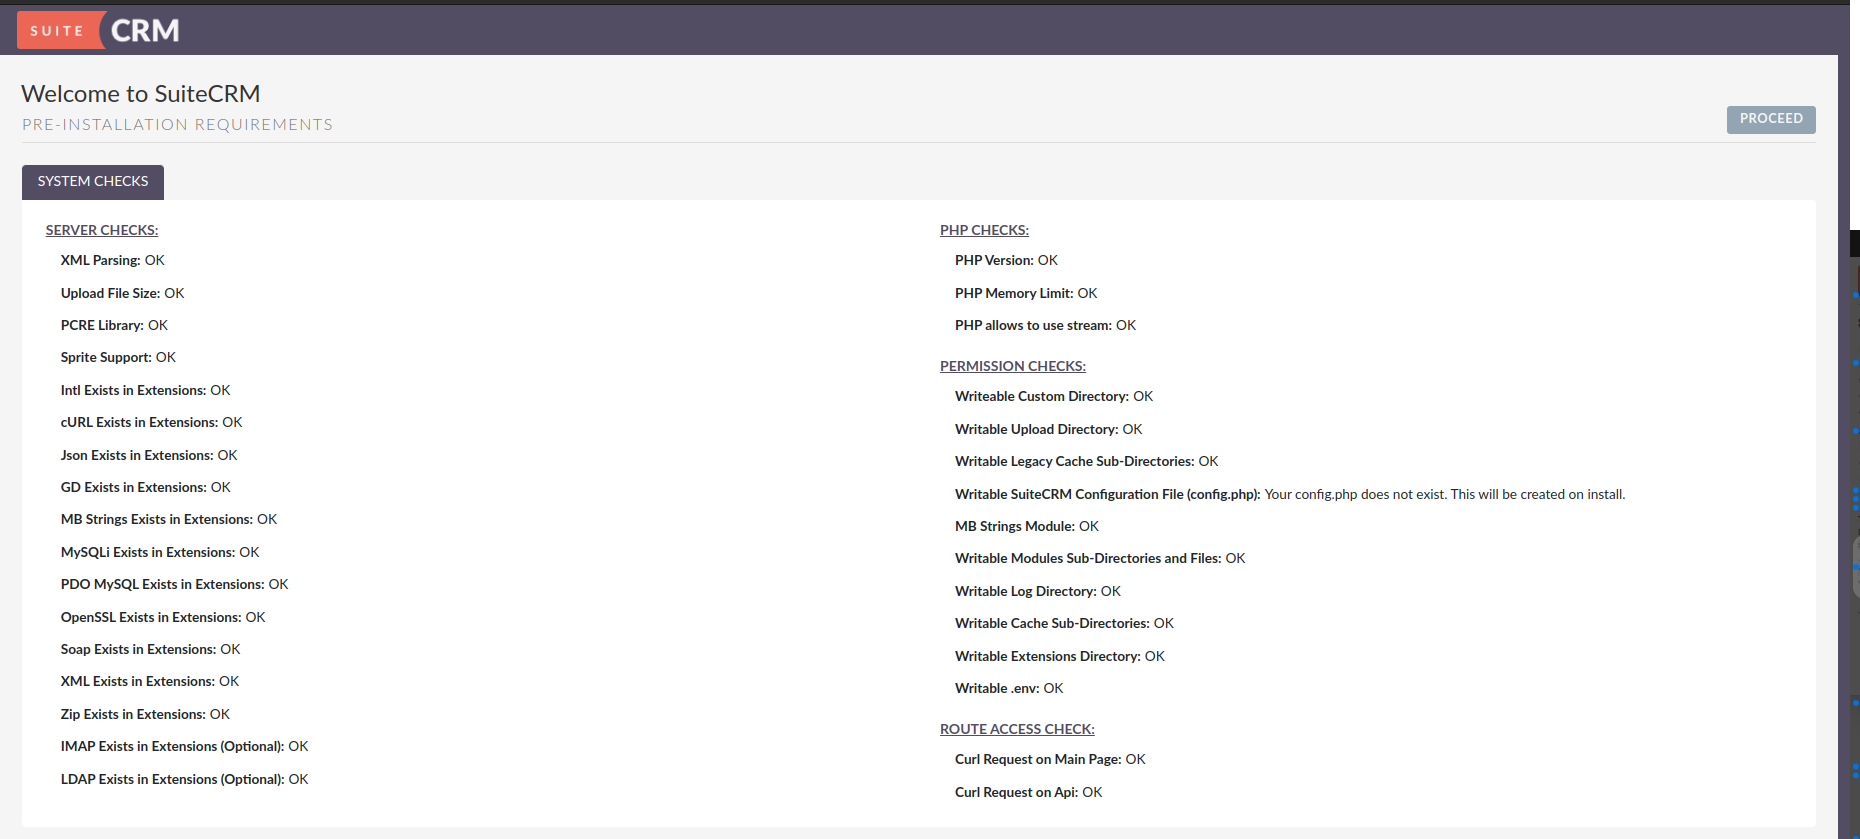

2.1 Pre-Install Warnings/Errors
Each check will either display OK if there are no issues or the following:

If a check that is required fails, a small error label will show as well as information on why the check didn’t pass.
Once the changes have been made to meet the requirements of the check, select the `RECHECK' button shown to re-run.
2.2 Cron Configuration
There is also instructions on how to setup crontab. These steps should ONLY be followed AFTER installation is complete
3. Installing using the install page
If all checks passed on the Pre-Install page then select the Proceed button and you will be redirected to
https://<your-suite-crm-instance-path>/#/install
3.1 Setup basic system configuration
The next step is to add the base system configuration in order for your system to work.

On this page apart from Ignore system check warnings all fields are required and need to be set a value.
In this tab you will find the following configurations:
3.1.1 URL OF SUITECRM INSTANCE

In the above field, the url you have currently will be pre-filled. However, if this is not correct, you should set the url where your SuiteCRM instance is located. A few example:
Tip: you can simply copy the url from your browser’s address bar
3.1.2 SuiteCRM Database User

In the above field you should set the user name for accessing your database.
Ensure that the Database User you specify has the permissions to create and write to the SuiteCRM database.
3.1.3 SuiteCRM Database User Password

In the above field you should set the password for accessing your database.
3.1.4 Host Name

In the above field you should set the host of your database.
In some systems when using localhost doctrine will try to use socket connection. However, socket connection is not supported at the moment, so in such cases, it may be best to try with the ip, e.g. 127.0.0.1
3.1.5 Database Name

In the above field you should set the name you want for the databases that will be created on your host during the install process, e.g. suite or suitecrm or another valid db name.
3.1.6 Database Port

The above field is set to the default port user in mysql and mariadb database engines. You should only change it in case your database host is using a different port.
3.1.7 POPULATE DATABASE WITH DEMO DATA

In the above field you can set if, during the install process, you want to pre-populate your database with demo data.
3.1.8 SuiteCRM Application Admin Name

In the above field you can set the username for your SuiteCRM instance’s administrator user, e.g. admin (this value
will be prefilled) or any other username you want to give.
3.1.9 SuiteCRM Admin User Password

In the above field you can set the password for your SuiteCRM instance’s administrator user.
3.2 Ignoring install warnings

Before running the install process, SuiteCRM is going to check for some system requirements, like max upload file size or memory limit. Some of these checks are optional, meaning that you can install the system without those.
In case you want to proceed with the installation even if there are warnings you can check the Ignore System Check Warnings checkbox
3.3 Run the install
After you have accepted the license and set correct values for all the configurations you can click on Proceed.
This is going to trigger the install process. As explained before the install process will first check for some system requirements.
If there any errors during the validation, the install process will halt and a modal will open with a description of the checks that failed.
If all the checks passed the system will continue on to the install process. During the install process you will see a loading spinner on the page. This process can take some time.
After the install process finishes you will be re-directed to the login page.
3.4 Double-checking configurations
Please double-check that the following configurations are correct
1 - Legacy config in public/legacy/config.php
-
site_url:-
if you do not have your vhost pointing to the
publicdir within your SuiteCRM 8 root folder, you should append/publicto your current host-
e.g. if your address is something like
https://your-host/crm/public,
-
-
2 - .htaccess in public/legacy/.htaccess
-
RewriteBase-
If you have your vhost pointing to
legacydir within the SuiteCRM 8 root folder. Then the correct value isRewriteBase /legacy -
Otherwise, you should prepend the path until the
publicfolder.-
e.g. if your address is something like
https://your-host/crm/public, then the correct value isRewriteBase /crm/public/legacy
-
-
3.5 Access the app
Try to login into your instance