Security Suite (Groups)
Security Suite allows control of what users can access. It allows restricting sensitive data in SuiteCRM to specific teams (groups). SecuritySuite comes loaded with options which allow you to configure it to meet your exact needs. Choose from a number of automatic assignment options to ensure that your users can always access the data that you need.
Allow Non-admins to Create Groups
System Administrators can allow non-admin users to add groups to records. This can be done by doing the following steps:
-
Navigate to Configure Tabs. Add Security Groups to the displayed tabs.
-
Run Repair Roles, within Admin→Repair, to be able to assign rights to Security Groups.
-
Edit role(s) to Enable Security Groups Management.
-
Edit role(s) to set List to All or Group for Security Groups Management as desired.
Configure SecuritySuite Settings
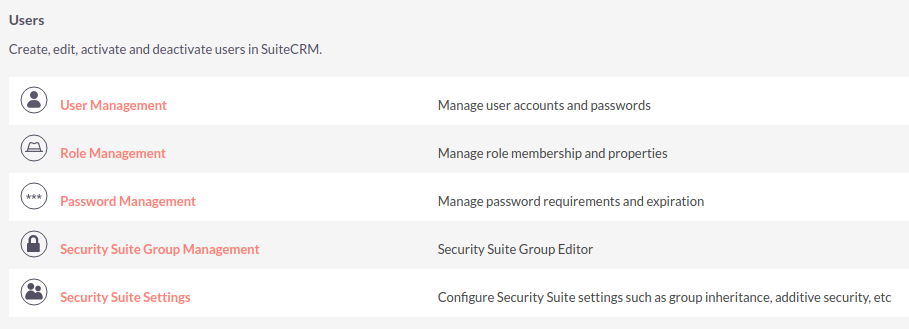
SecuritySuite is very configurable and allows for support near every possible situation. Because of that there may be a learning curve and some time required to understand what each option does and how it may be used for your specific needs. You can find the settings page by going to Admin→SecuritySuite Settings.
Groups Setup
There are 3 key steps to setting up Groups so that you work correctly.
-
Create a group for each team of users and add the appropriate users to the group.
-
Create a role and select Group for the access level for every appropriate cell in the grid. Assign that role to each group
-
Add the groups to records in your SuiteCRM instance. You can use the Mass Assign on the List View to do this. Going forward the groups will automatically inherit based on your SecuritySuite Settings. You can also use logic hooks, workflow, or do a direct database insert into the securitygroups_records table if doing a one-time initial setup.
If your users should only typically see their own records then the role assigned to the group would be configured to have Owner only rights. A manager who is a part of the group and who should also be able to see all records in the group would have a role directly assigned to the manager’s record that gives Group access.
For more help check out this Introduction Video.
Roles determine what a user can do with a record once they have access to it.
-
Create the roles
-
Edit role(s) to Enable Security Groups Management
-
Edit role(s) to set List to All or Group for Security Groups Management as desired
A Typical Hierarchy Setup
Although SecuritySuite can handle any organizational structure, the most common scenario is one where the owner can see everything, managers can see both their own records as well as those of their team, and team members can only see their own records.
The Scenario
This company has 2 sales teams; East and West. The owner, Jill, should be able to see everything. The East Sales team is lead by Will and Sarah leads the West Sales team. Both of them should see everything just in your own respective teams. The rest of the Sales Reps in each teams should only be allowed to see your own records.
Set up the Groups
-
Create a group called East Sales
-
Add Will and the Sales Reps
-
Create a group called West Sales
-
Add Sarah and the Sales Reps
Set up the Roles
-
Create a role called Everything and set the rights to All.Tips and Tricks: Click the header in any column on the role grid and you can set the rights for the whole column at one time
-
Assign the Everything role directly to Jill’s user account
-
Create a role called Group Only and set the rights for everything to Group
-
Assign the Group role directly to Will and Sarah
-
Create a role called Owner Only and set the rights for everything to Owner
-
Assign the Owner Only role to the East Sales and West Sales groups
Assign the Groups
This instance already has some existing Leads so we will assign them to the appropriate groups.
-
Go to the Leads List View and search for the Leads that should belong to the East Sales group
-
Check the appropriate Leads, in the Mass Assign panel choose East Sales, and click "Assign"
-
Repeat for the West Sales team
Going forward the groups will be automatically inherited by any Calls, Contacts, Notes, etc that get added based on the SecuritySuite Settings that are configured. If the SuiteCRM instance is already loaded with lots of data at the time of starting with SecuritySuite then there may be some initial work to be done to add those groups to the related records. The Mass Assign functionality on the List View can be used or direct database insertion into the securitygroups_records table. See existing data in that table for how to format the data. This will require SQL knowledge if you want to go that route.
Check the Settings
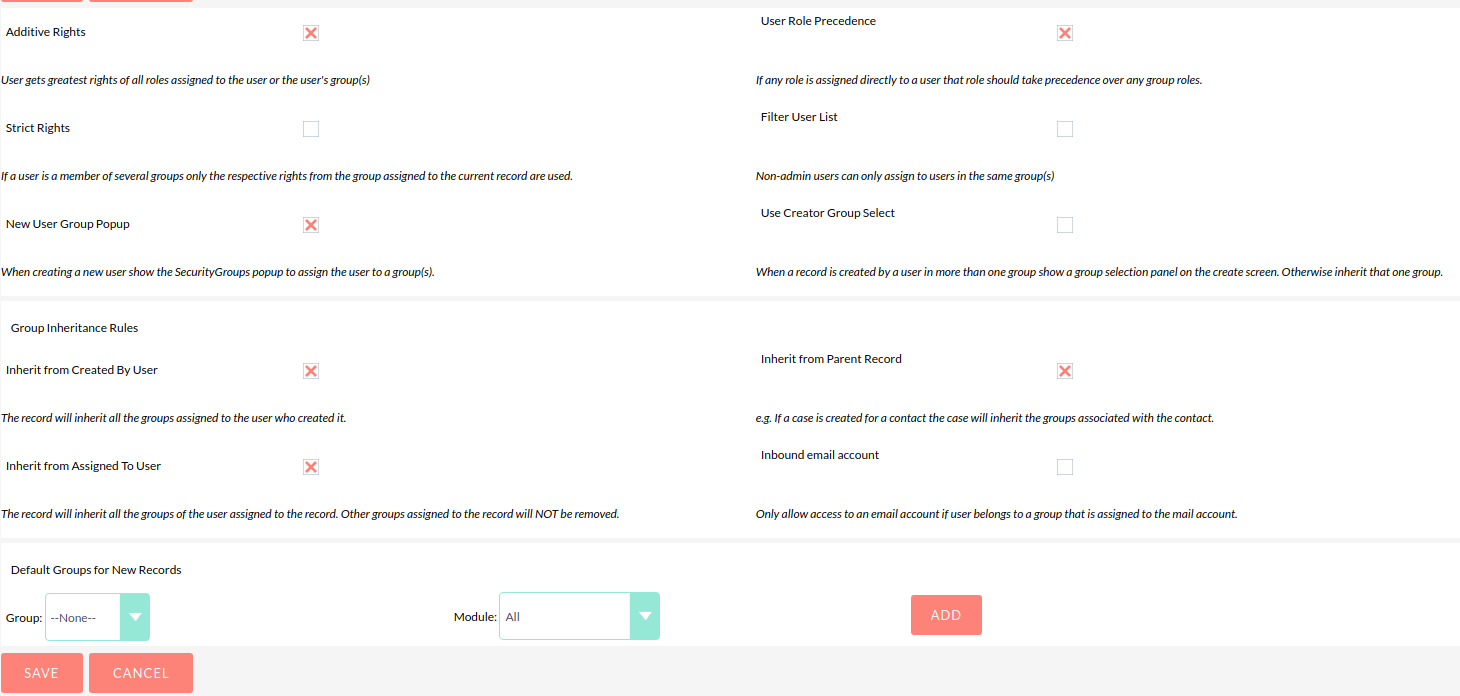
These settings determine how SecuritySuite functions. In the Group Inheritance Rules panel the defaults of "Inherit from Created By User", "Inherit from Assigned To User", and "Inherit from Parent Record" will work perfectly in this scenario.
Any Lead that gets created will automatically have groups assigned to it based on who created it and who gets assigned to it. If a Call is created for a Lead then the Call will inherit the groups from the Lead record (parent record) along with inheriting the groups from the created by user and the assigned to user.
Another key setting is "Strict Rights". In the scenario above the default settings will cause the links on the List View for the team Leads to show with no link for records that are assigned to your group. In many cases you will want to uncheck "Strict Rights" so that you can assign groups in the manner described in this doc.
That’s it!
The hardest part is always the initial setup. Once you have things configured and figured out it will just run on its own.
Have a more complicated structure? Apply the same principles here for each additional level of hierarchy that you may have. The key is to create a group at the lowest levels of the structure and then work your way back up.
Advanced Options
SuiteCRM System Administrators can configure many advanced options for Security Suite. This allows you to control various access/rights, inheriting of records, filters and more.
Additive Rights
User gets greatest rights of all roles assigned to you or user’s group(s)
Strict Rights
If a user is a member of several groups only the respective rights from the group assigned to the current record are used.
New User Group Popup
When creating a new user show the SecurityGroups popup to assign them to a group(s).
User Role Precedence
If any role is assigned directly to a user that role should take precedence over any group roles.
Filter User List
Non-admin users can only assign to users in the same group(s)
Use Popup Select
When a record is created by a user in more than one group popup a group selection screen otherwise inherit that one group. Inheritance rules will only be used for non-user created records (e.g. Workflows, etc).
Use Creator Group Select
Adds a panel to a record creation screen if a user is a member of more than one inheritable group that allows a user to select one or more groups that you belongs to that should be associated with the newly created record. If a user is in just one group the normal inheritance rules will instead be applied.
The new record will still inherit from the Assigned To user or Parent record if these options are set. This setting only overrides the Created By setting.
Inherit from Created By User
The record will inherit all the groups assigned to the user who created it.
Inherit from Assigned To User
The record will inherit all the groups of the user assigned to the record. Other groups assigned to the record will NOT be removed.
Inherit from Parent Record
e.g. If a case is created for a contact the case will inherit the groups associated with the contact.
Default Groups for New Records
Set groups that should always be attached when a specific module is created.
Inbound email account
Locks down inbound email accounts in the email client to only list those that belong to the same group as the current user.

