User Guide - Setting Up Your Calendar
Overview
This guide walks you through setting up your personal calendar synchronization with SuiteCRM. Once configured, your SuiteCRM meetings and external calendar events will sync bidirectionally - changes in either system are reflected in both.
Each user manages their own calendar connection through the Calendar Accounts module. Your administrator configures global settings, but you control which calendar connects to your SuiteCRM account.
Accessing Calendar Accounts
You can access Calendar Accounts through multiple locations in SuiteCRM:
-
User Profile: Open your user profile and click the Calendar Accounts sidebar menu link
-
Navigation Menu: If enabled by your administrator, Calendar Accounts appears in the main navigation
Choose the method that works best for your workflow.
Prerequisites Checklist
Before creating a Calendar Account, verify these prerequisites are complete:
For Google Calendar
-
External OAuth Provider configured in Administration > External OAuth Providers (admin task)
-
External OAuth Connection created via Profile > External OAuth Connection (user task)
-
If no Google provider is available when creating your Connection, contact your administrator
See Administrator Setup Guide for OAuth Provider configuration details.
For CalDAV
-
See CalDAV Provider Guide for complete CalDAV setup instructions
For All Providers
-
SuiteCRM scheduler (cron job) is running for automatic synchronization
-
Calendar Accounts Sync job is set to Active in Administration > Scheduler
Without the scheduler running, only manual synchronization is possible. Contact your administrator if you’re unsure whether the scheduler is configured.
Creating a Calendar Account
Follow these steps to create your calendar connection:
-
Navigate to Calendar Accounts
-
Click Create Calendar Account
-
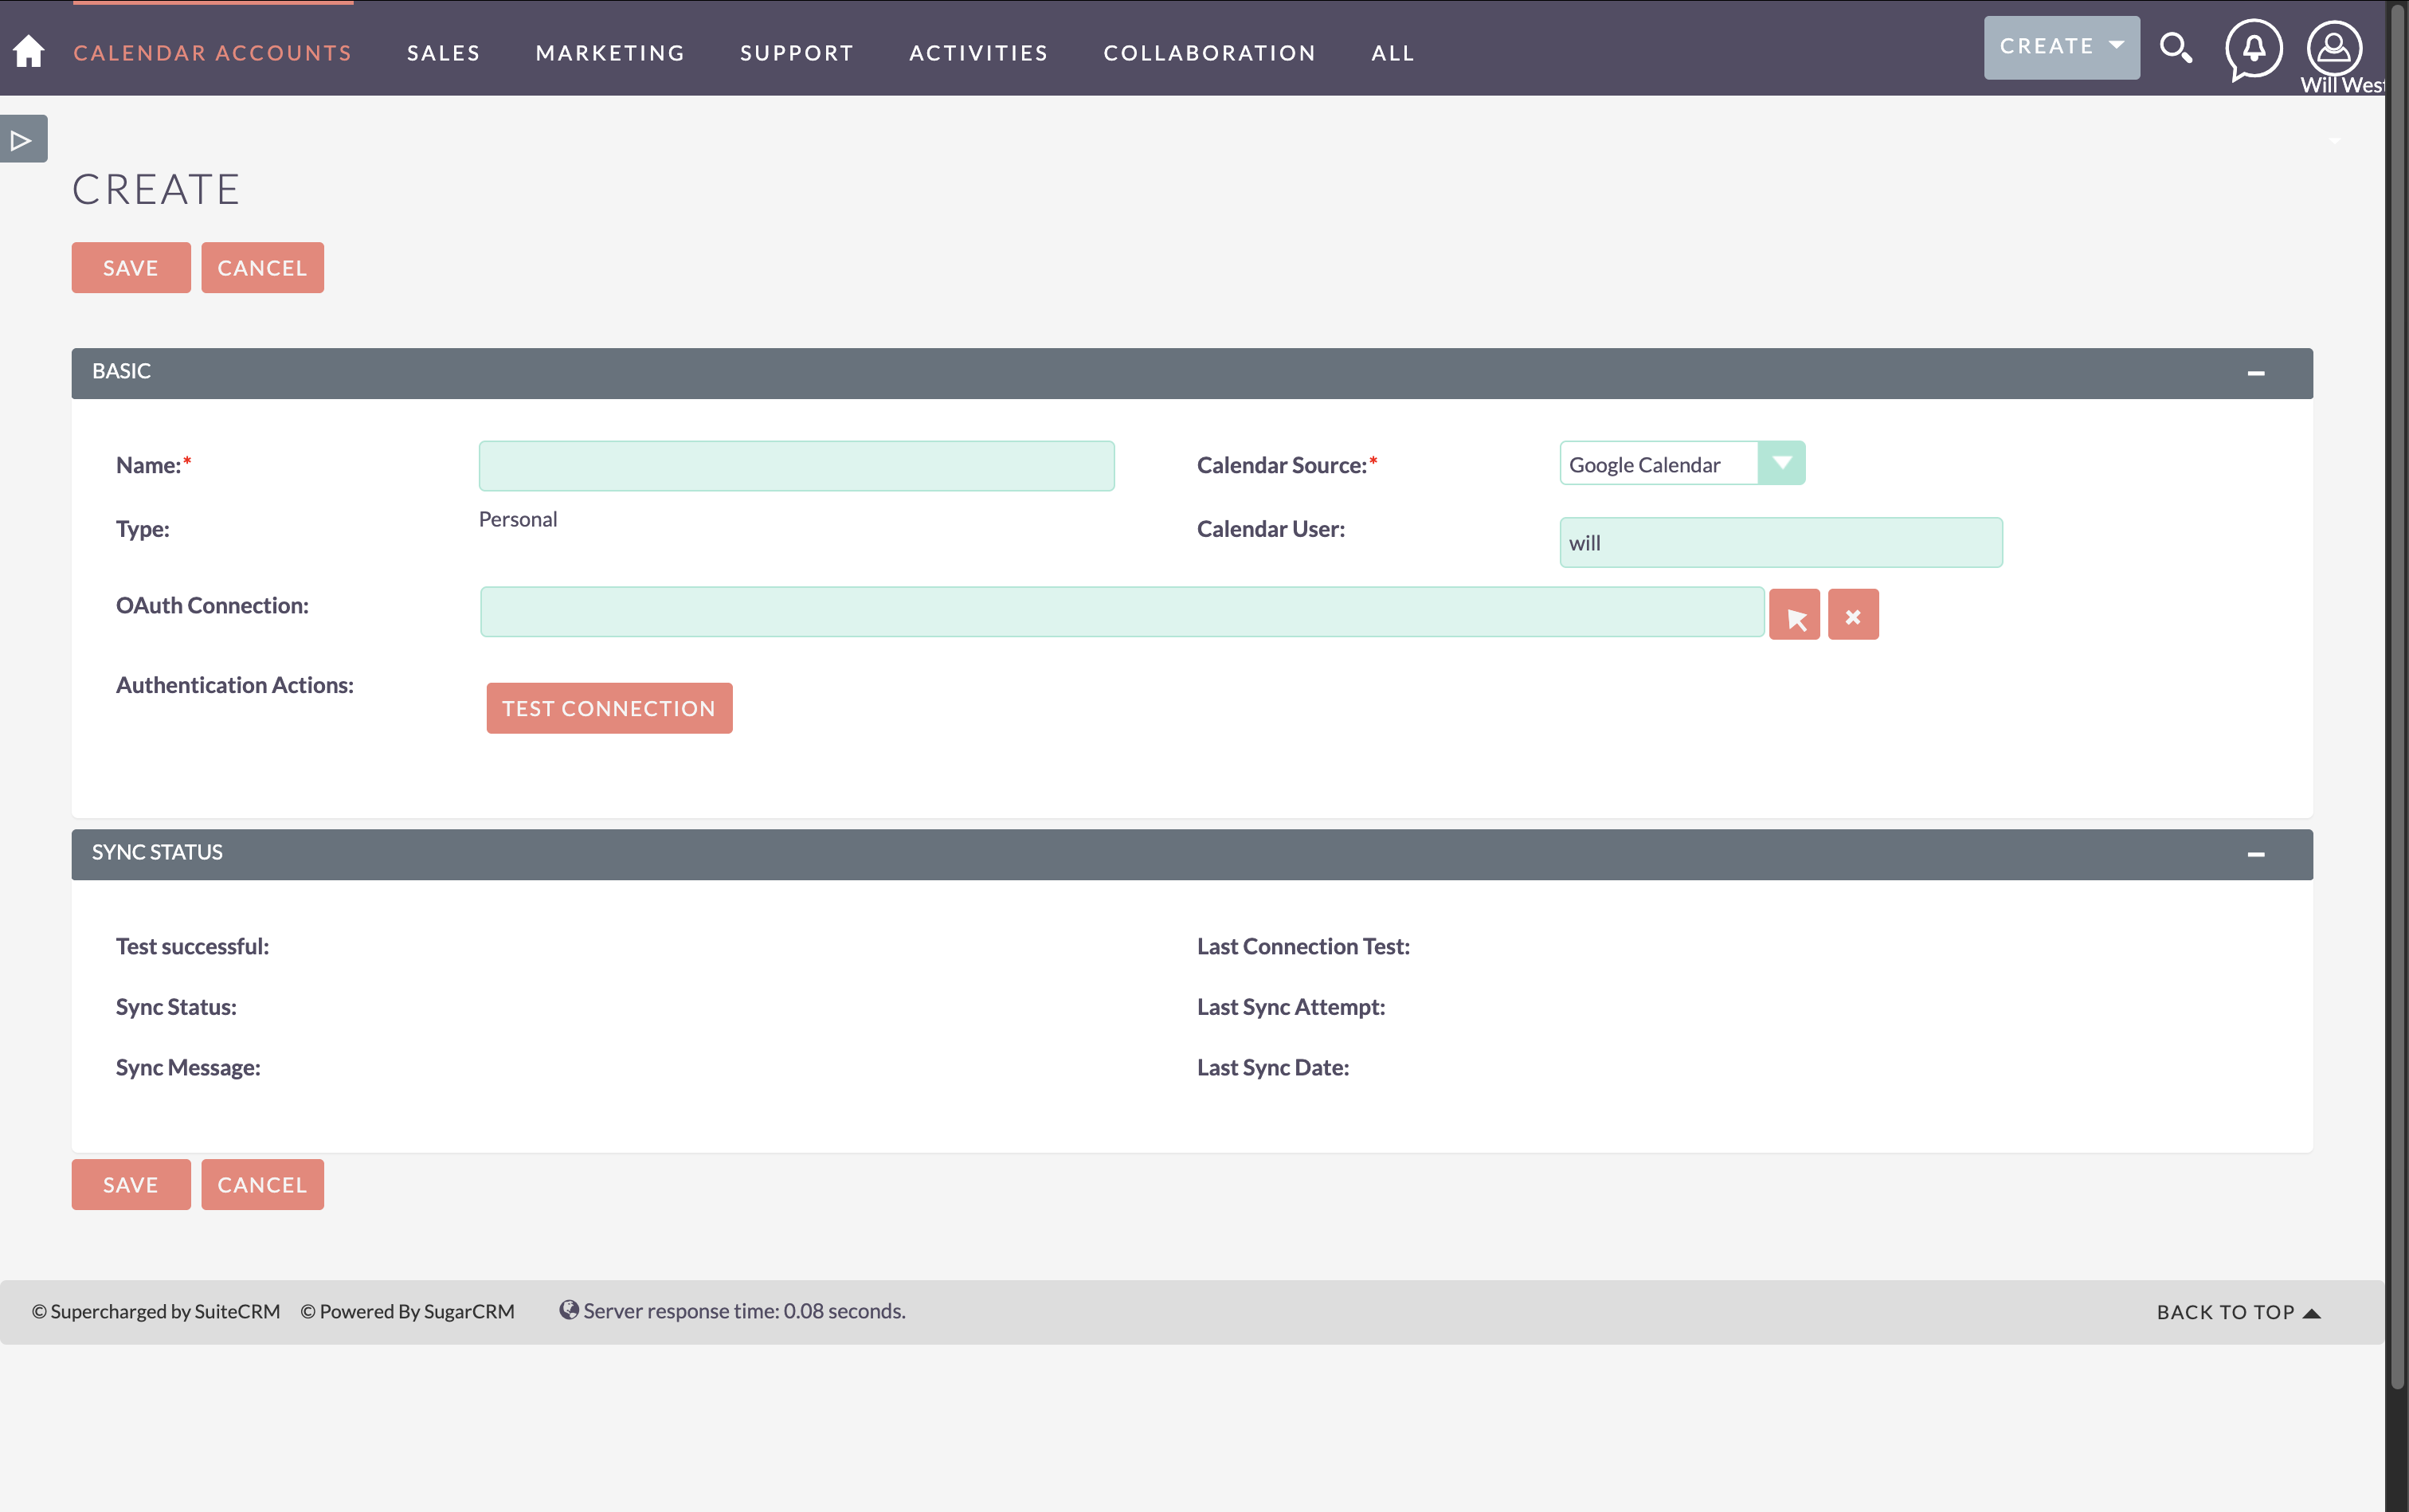
Fill in the required fields:
-
Name: A descriptive name for this connection (e.g., "My Google Calendar" or "Work Calendar")
-
Calendar Source: Select your provider (Google Calendar or CalDAV)
-
OAuth Connection: (Google Calendar only) Select the External OAuth Connection
-
Calendar User: The SuiteCRM user whose calendar will sync. This field is automatically populated with the current user and can only be modified by administrators.
-
-
Complete the authentication based on your selected provider (see below)
The Calendar Source determines which authentication method you’ll use:
-
Google Calendar: OAuth-based authentication with popup authorization
-
CalDAV: Direct credential entry with server URL, username, and password
Google Calendar Authentication
For Google Calendar connections, follow this OAuth authorization flow:
-
Select Google Calendar as the Calendar Source
-
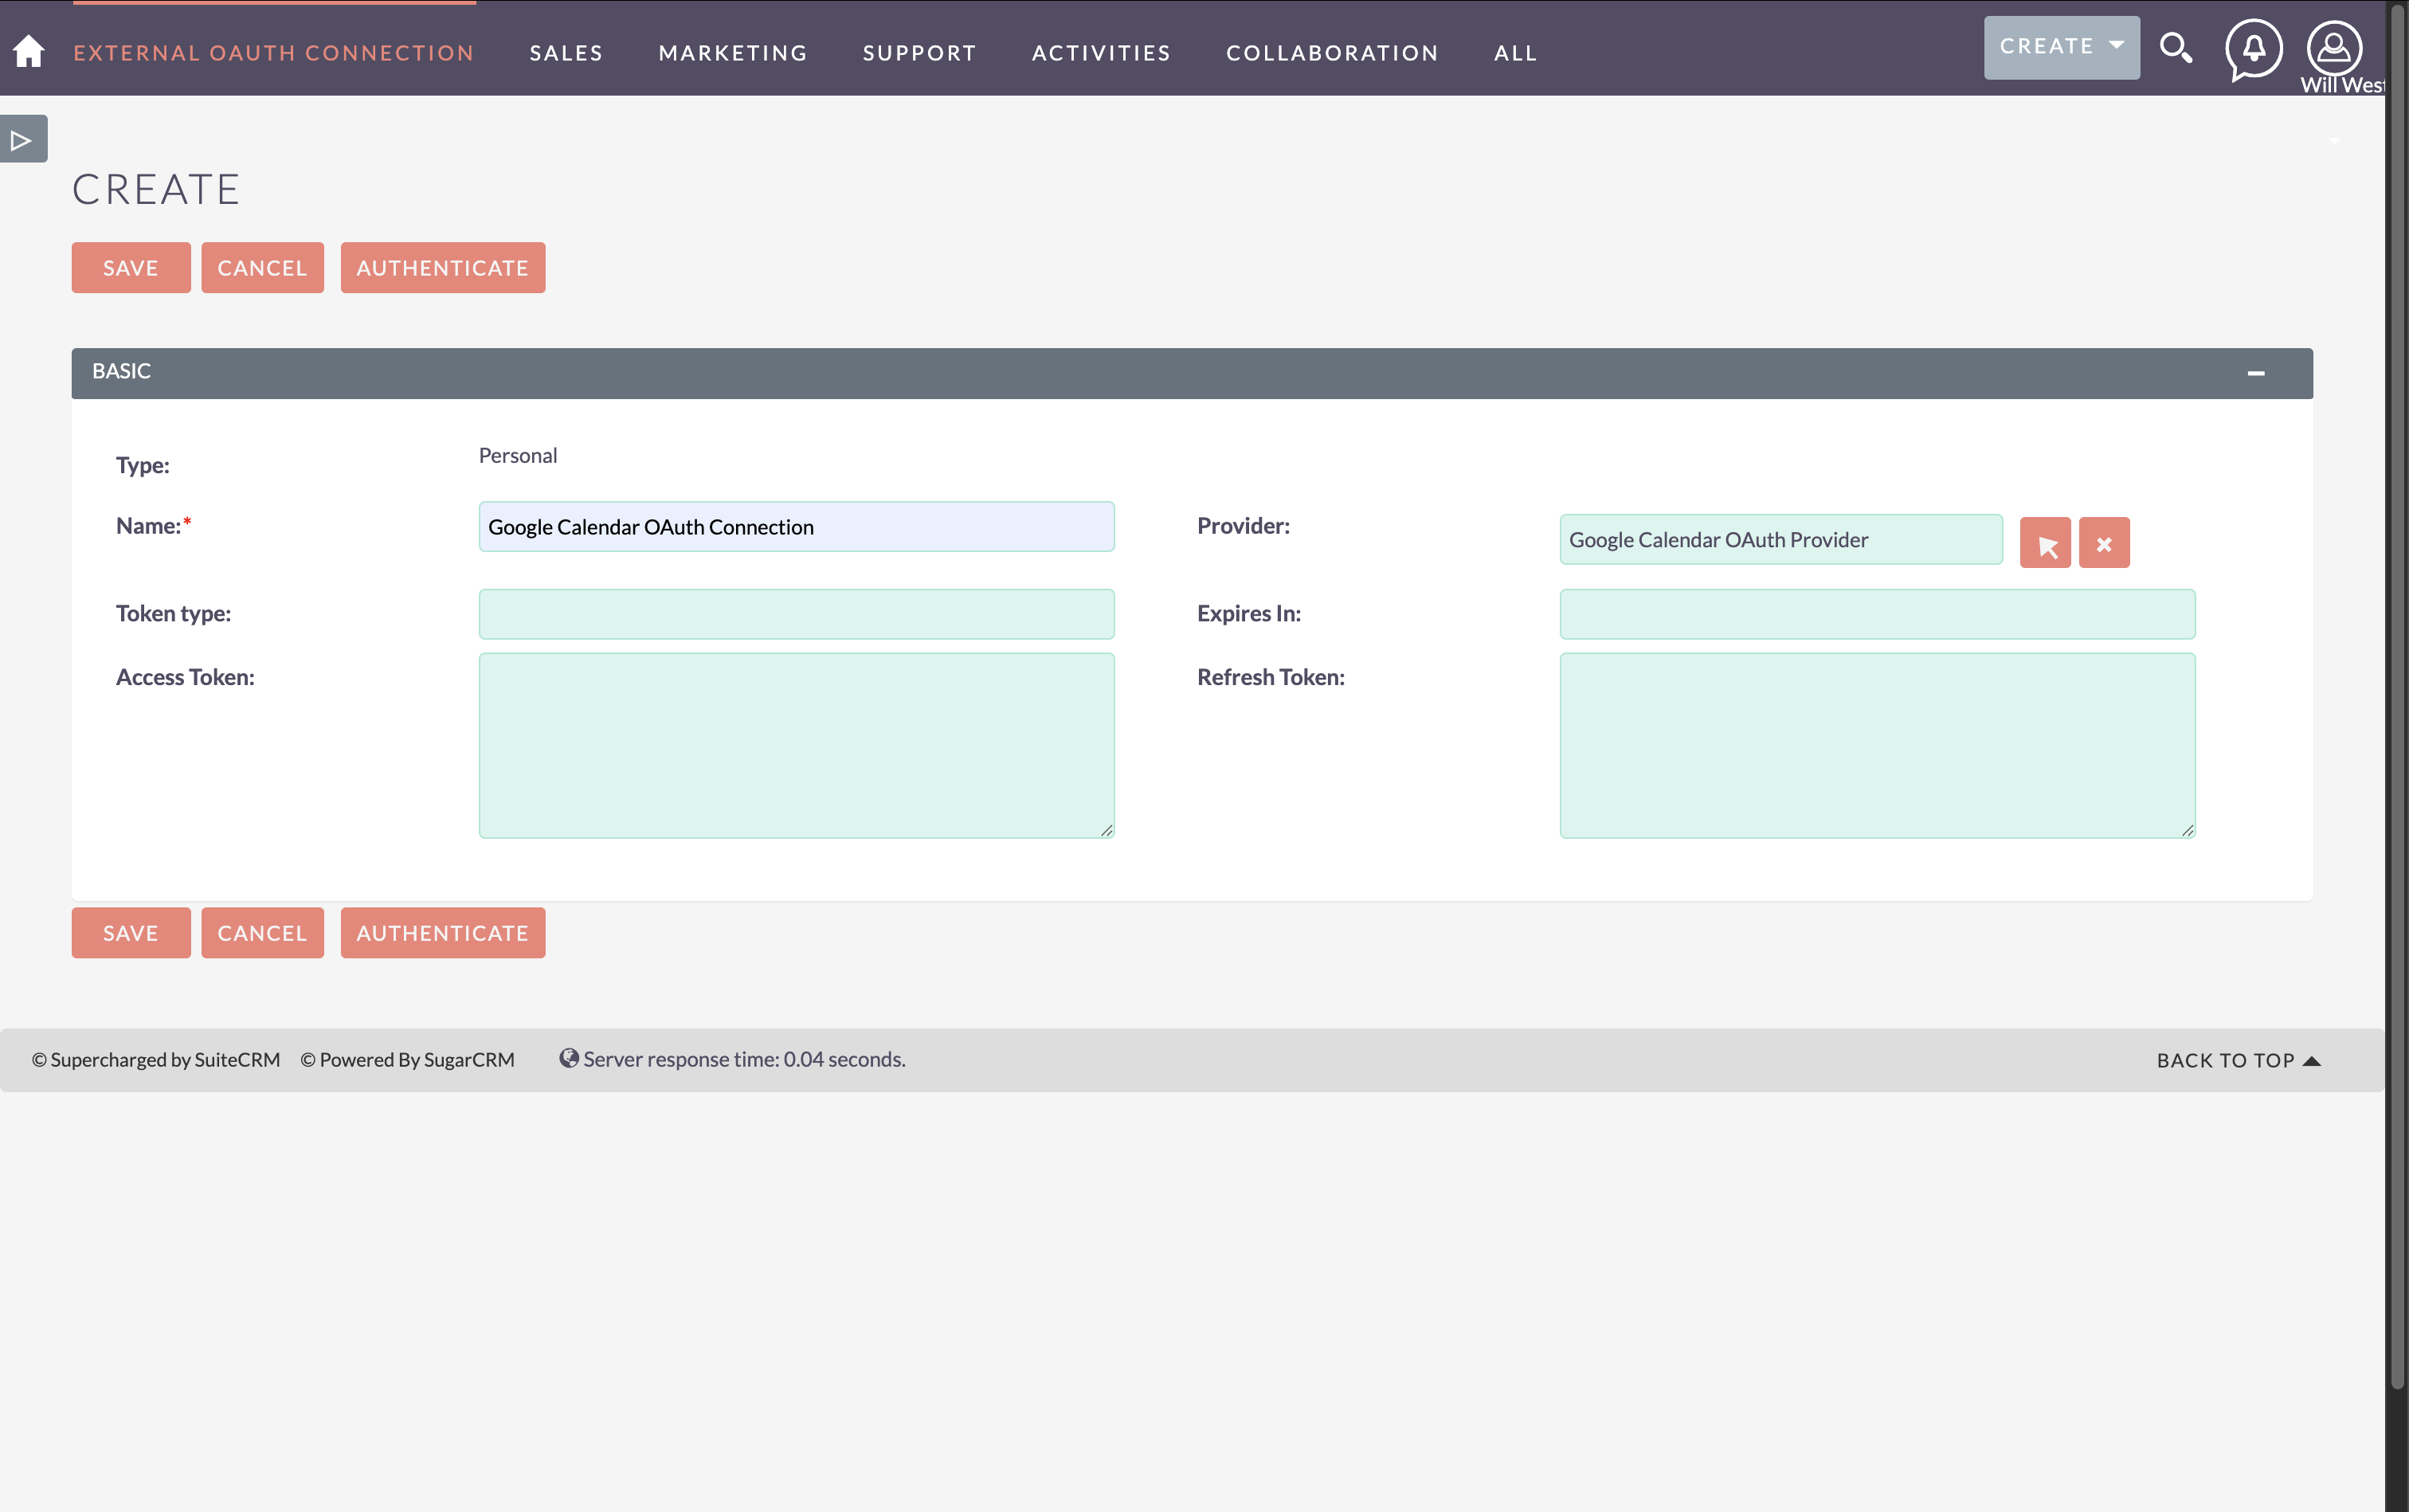
In the OAuth Connection field, select your configured Google OAuth Connection
-
If no connections appear, create one via Profile > External OAuth Connection > Personal OAuth Connection, select the Google provider, and click Authenticate
-
If no Google provider is available, contact your administrator to configure an External OAuth Provider in Administration > External OAuth Providers
-
-
Click Authenticate to begin the authorization process
-
A popup window opens displaying the Google authorization screen
-
Sign in with your Google account if prompted
-
Review the permissions requested by SuiteCRM
-
Click Allow to grant SuiteCRM access to your calendar
-
The popup closes automatically after successful authorization
-
Click Save to create the Calendar Account
The OAuth token is stored securely and automatically refreshes when needed. You’ll only need to re-authorize if you revoke access through your Google Account settings or if the token expires.
The Google authorization popup must complete successfully before saving the Calendar Account. If the popup is blocked by your browser, enable popups for your SuiteCRM domain.
CalDAV Authentication
For CalDAV servers, you enter credentials directly:
-
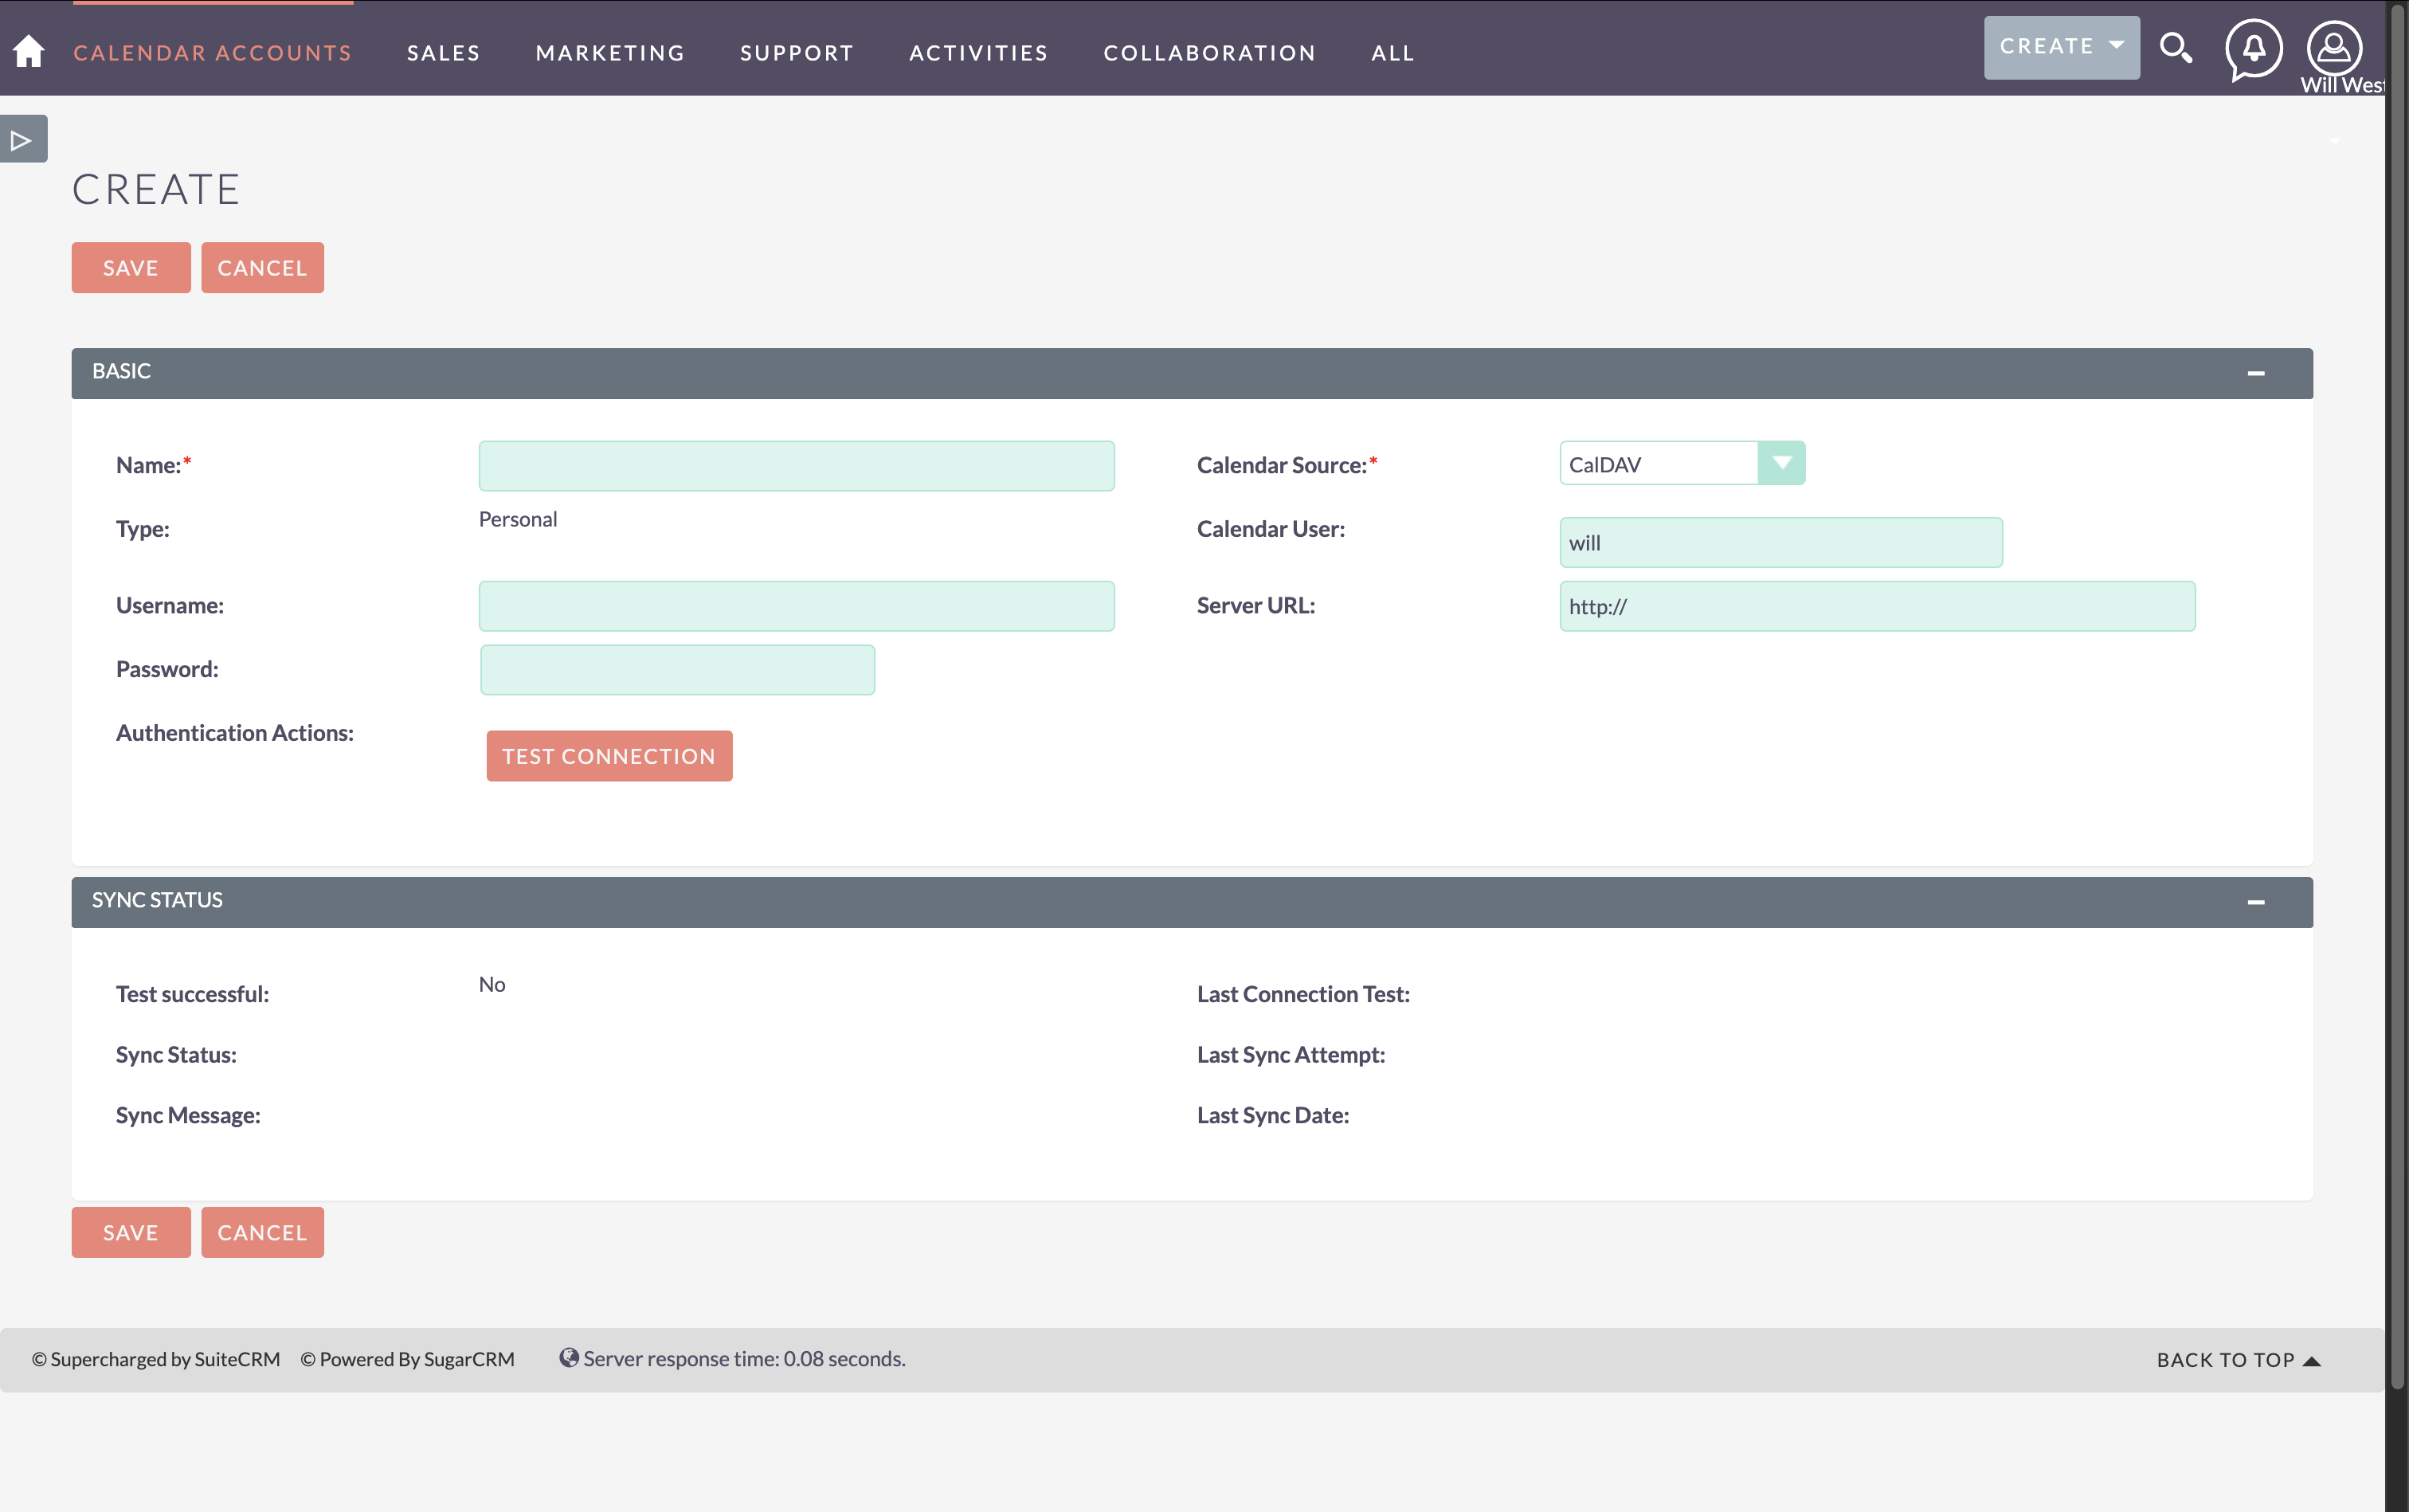
Select CalDAV as the Calendar Source
-
Enter your CalDAV credentials:
-
Server URL: The full CalDAV calendar URL pointing to the specific calendar you want to sync
-
Username: Your CalDAV account username
-
Password: Your CalDAV account password
-
-
Click Save to create the Calendar Account
The Server URL must point directly to the specific calendar you want to sync, not just the CalDAV server root. The URL typically ends with a trailing slash.
For detailed instructions on finding your CalDAV URL for different providers, see CalDAV Provider Guide.
If you’re unsure about your CalDAV URL, contact your calendar server administrator. The URL must include the full path to the specific calendar, including a trailing slash.
Test Connection Workflow
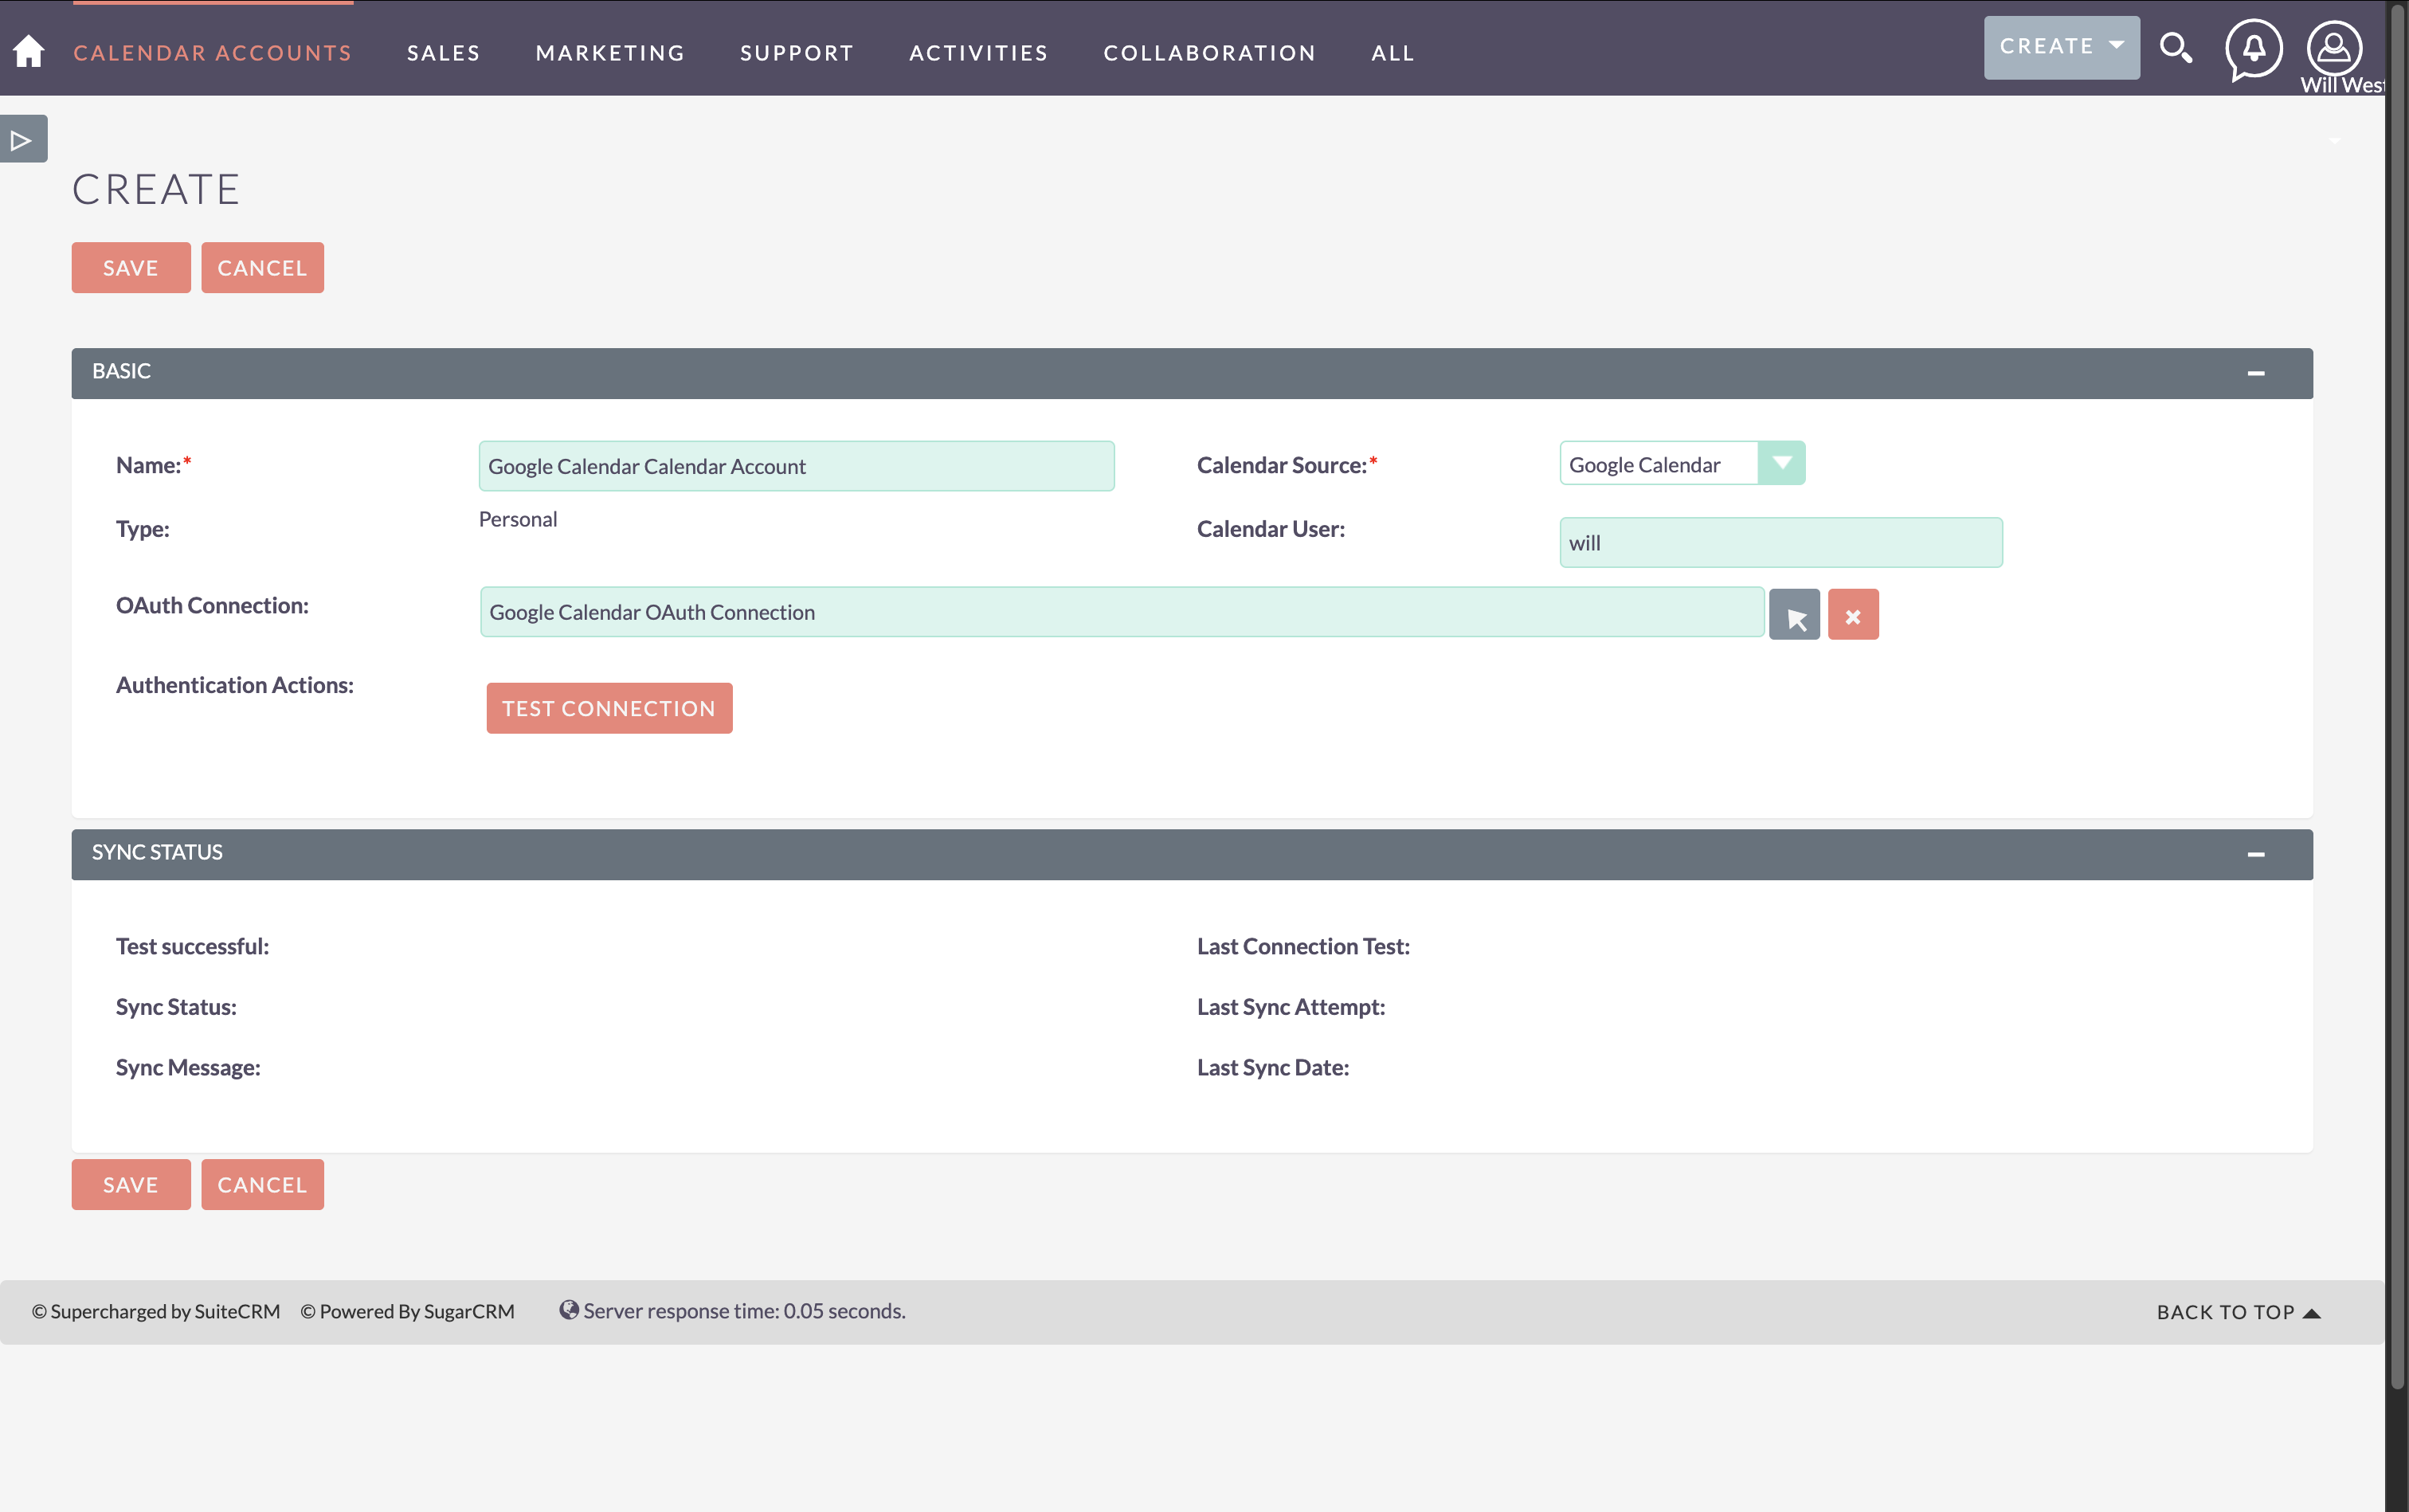
After creating your Calendar Account, you can test the connection to verify everything is configured correctly. The Test Connection button requires saving the account first.
Complete Test Connection Process
-
Fill in all required fields and complete authentication (OAuth or CalDAV)
-
Click Save to create the Calendar Account record
-
The account is saved and you’re taken to the detail view
-
Click Edit to re-open the account in edit mode
-
The Test Connection button now appears at the top of the form
-
Click Test Connection to verify the setup
-
A popup displays the test results
-
Click Save again to preserve the test result in the account record
What Test Connection Verifies
The test validates several aspects of your calendar setup:
-
OAuth Token Validity: For Google Calendar, confirms the OAuth token is valid and authorized
-
Credential Validation: For CalDAV, confirms username and password are correct
-
API Access: Verifies SuiteCRM can reach the calendar provider’s API endpoints
-
Calendar Permissions: Confirms you have read/write access to the calendar
-
Calendar Discovery: Retrieves available calendars and detects the external calendar ID
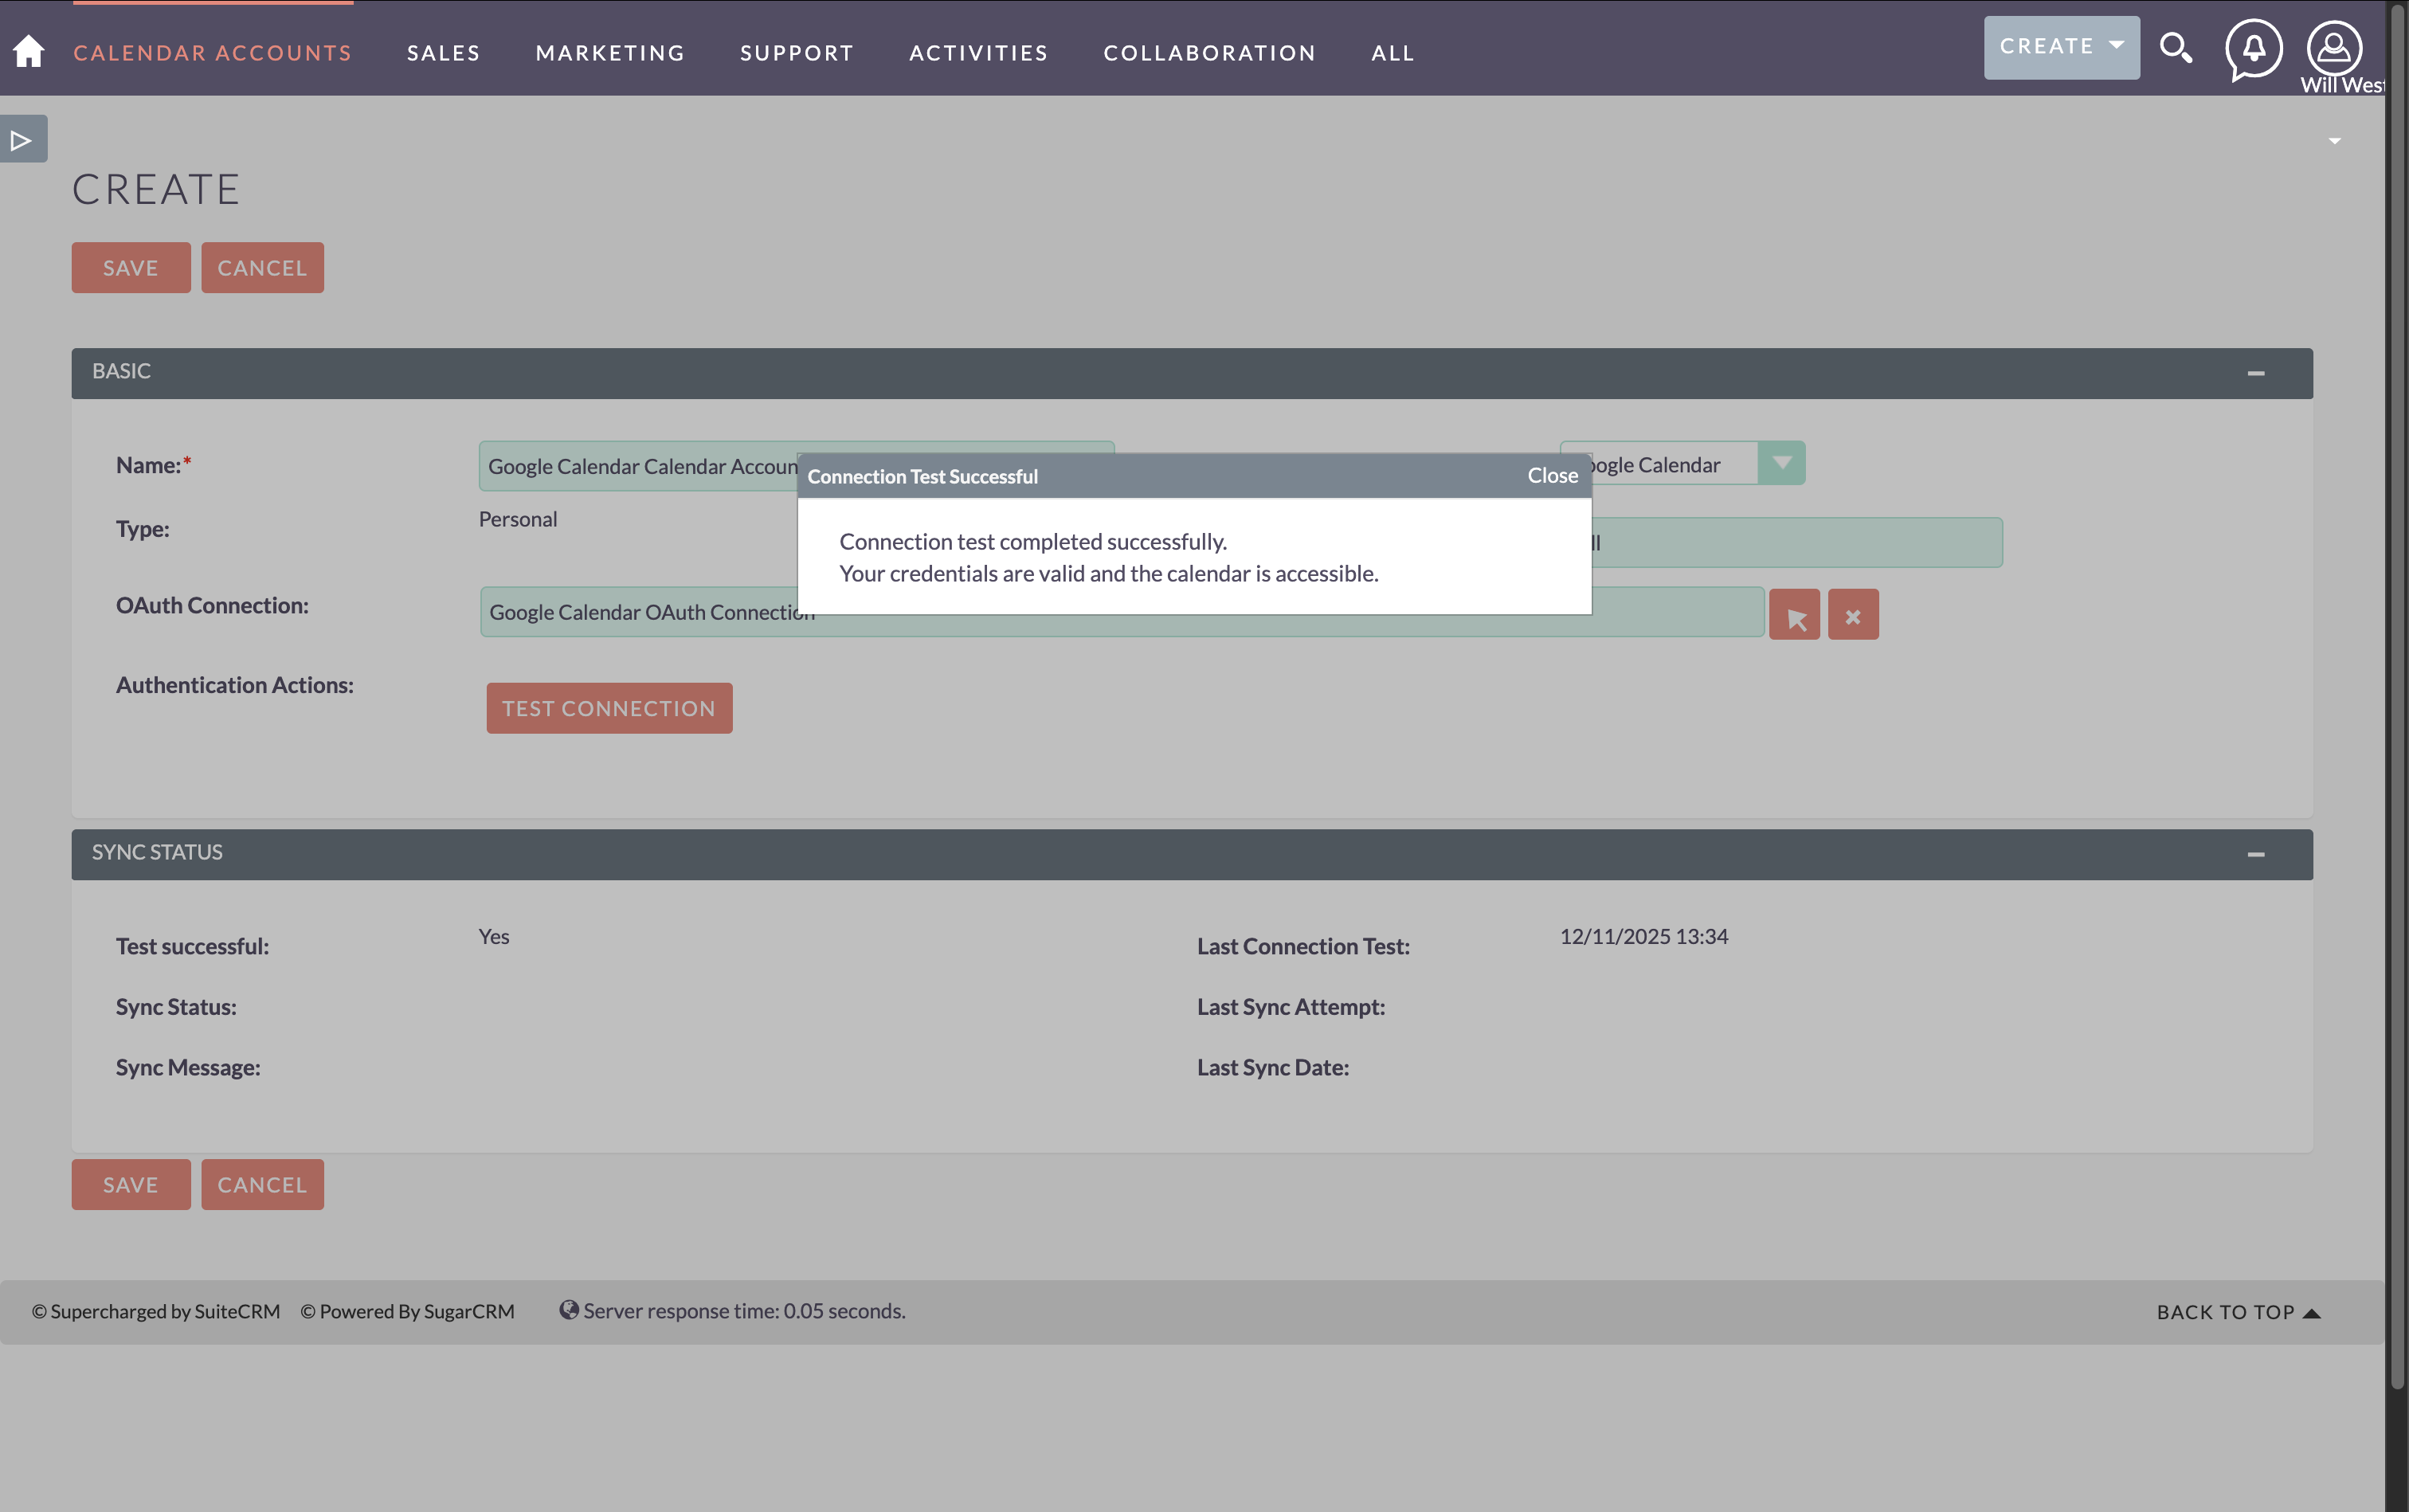
Test Results
On success, you’ll see:
-
"Connection test completed successfully" message
On failure, you’ll see an error message indicating what went wrong. Common errors include:
-
Invalid credentials: Check your username, password, or OAuth authorization
-
Calendar not found: Verify your CalDAV Server URL is correct
-
Permission denied: Ensure you have read/write access to the calendar
-
Duplicate calendar detected: The same external calendar is already linked to another Calendar Account
For detailed troubleshooting, see Understanding Sync & Troubleshooting.
You must click Save after testing to preserve the test result. If you navigate away without saving, the test status is not recorded.
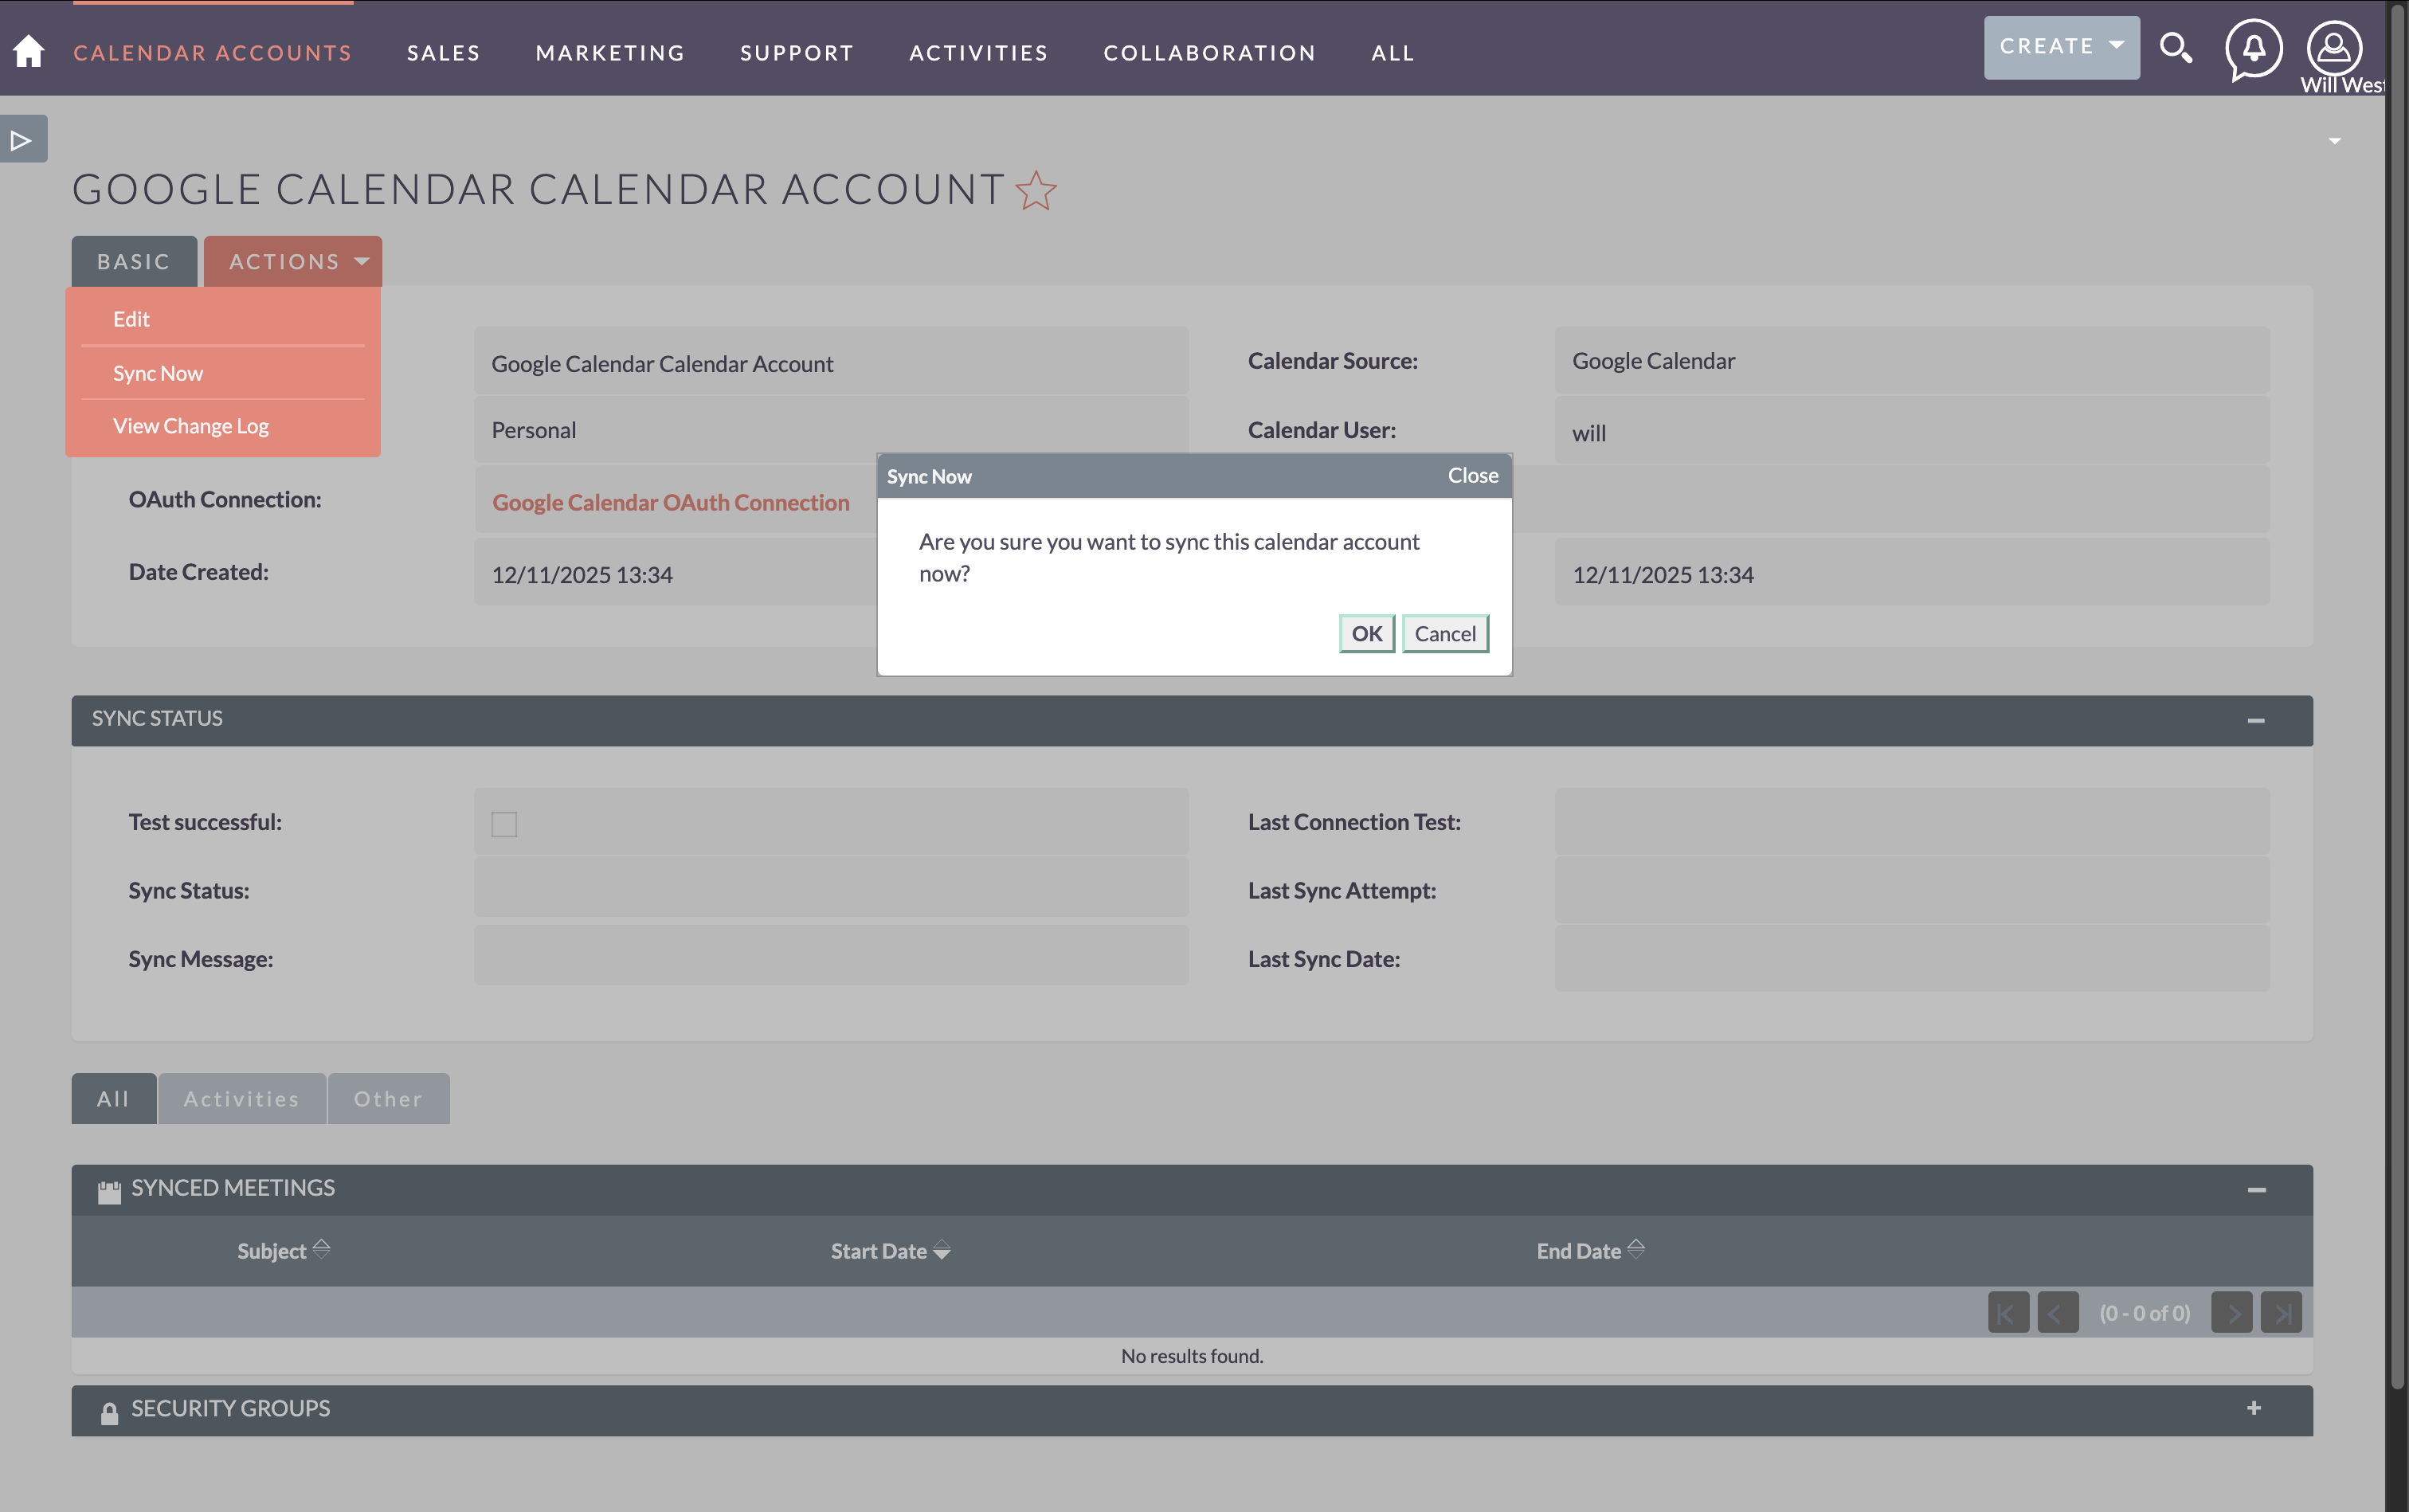
Sync Now Button
After your Calendar Account is saved and tested, you can trigger immediate synchronization using the Sync Now button.
The Sync Now button is only available in the detail view (not in edit mode). To use it:
-
Navigate to your Calendar Account detail view
-
Locate the Sync Now button
-
Click the button to trigger immediate synchronization
-
A confirmation popup appears showing the sync is queued
-
Synchronization runs in the background
When to Use Sync Now
Manual sync is useful for:
-
Testing After Initial Setup: Verify synchronization works immediately after creating your account
-
Forcing Updates: Apply changes without waiting for the next scheduled sync
-
Troubleshooting: Diagnose sync issues by triggering an immediate sync and checking the results
-
After Making Changes: Sync new or modified meetings right away
Manual sync bypasses the scheduler and runs immediately, but it still respects the global sync settings configured by your administrator (sync window, conflict resolution strategy, etc.).
Sync Now triggers synchronization only for your specific Calendar Account. It does not affect other users' accounts.
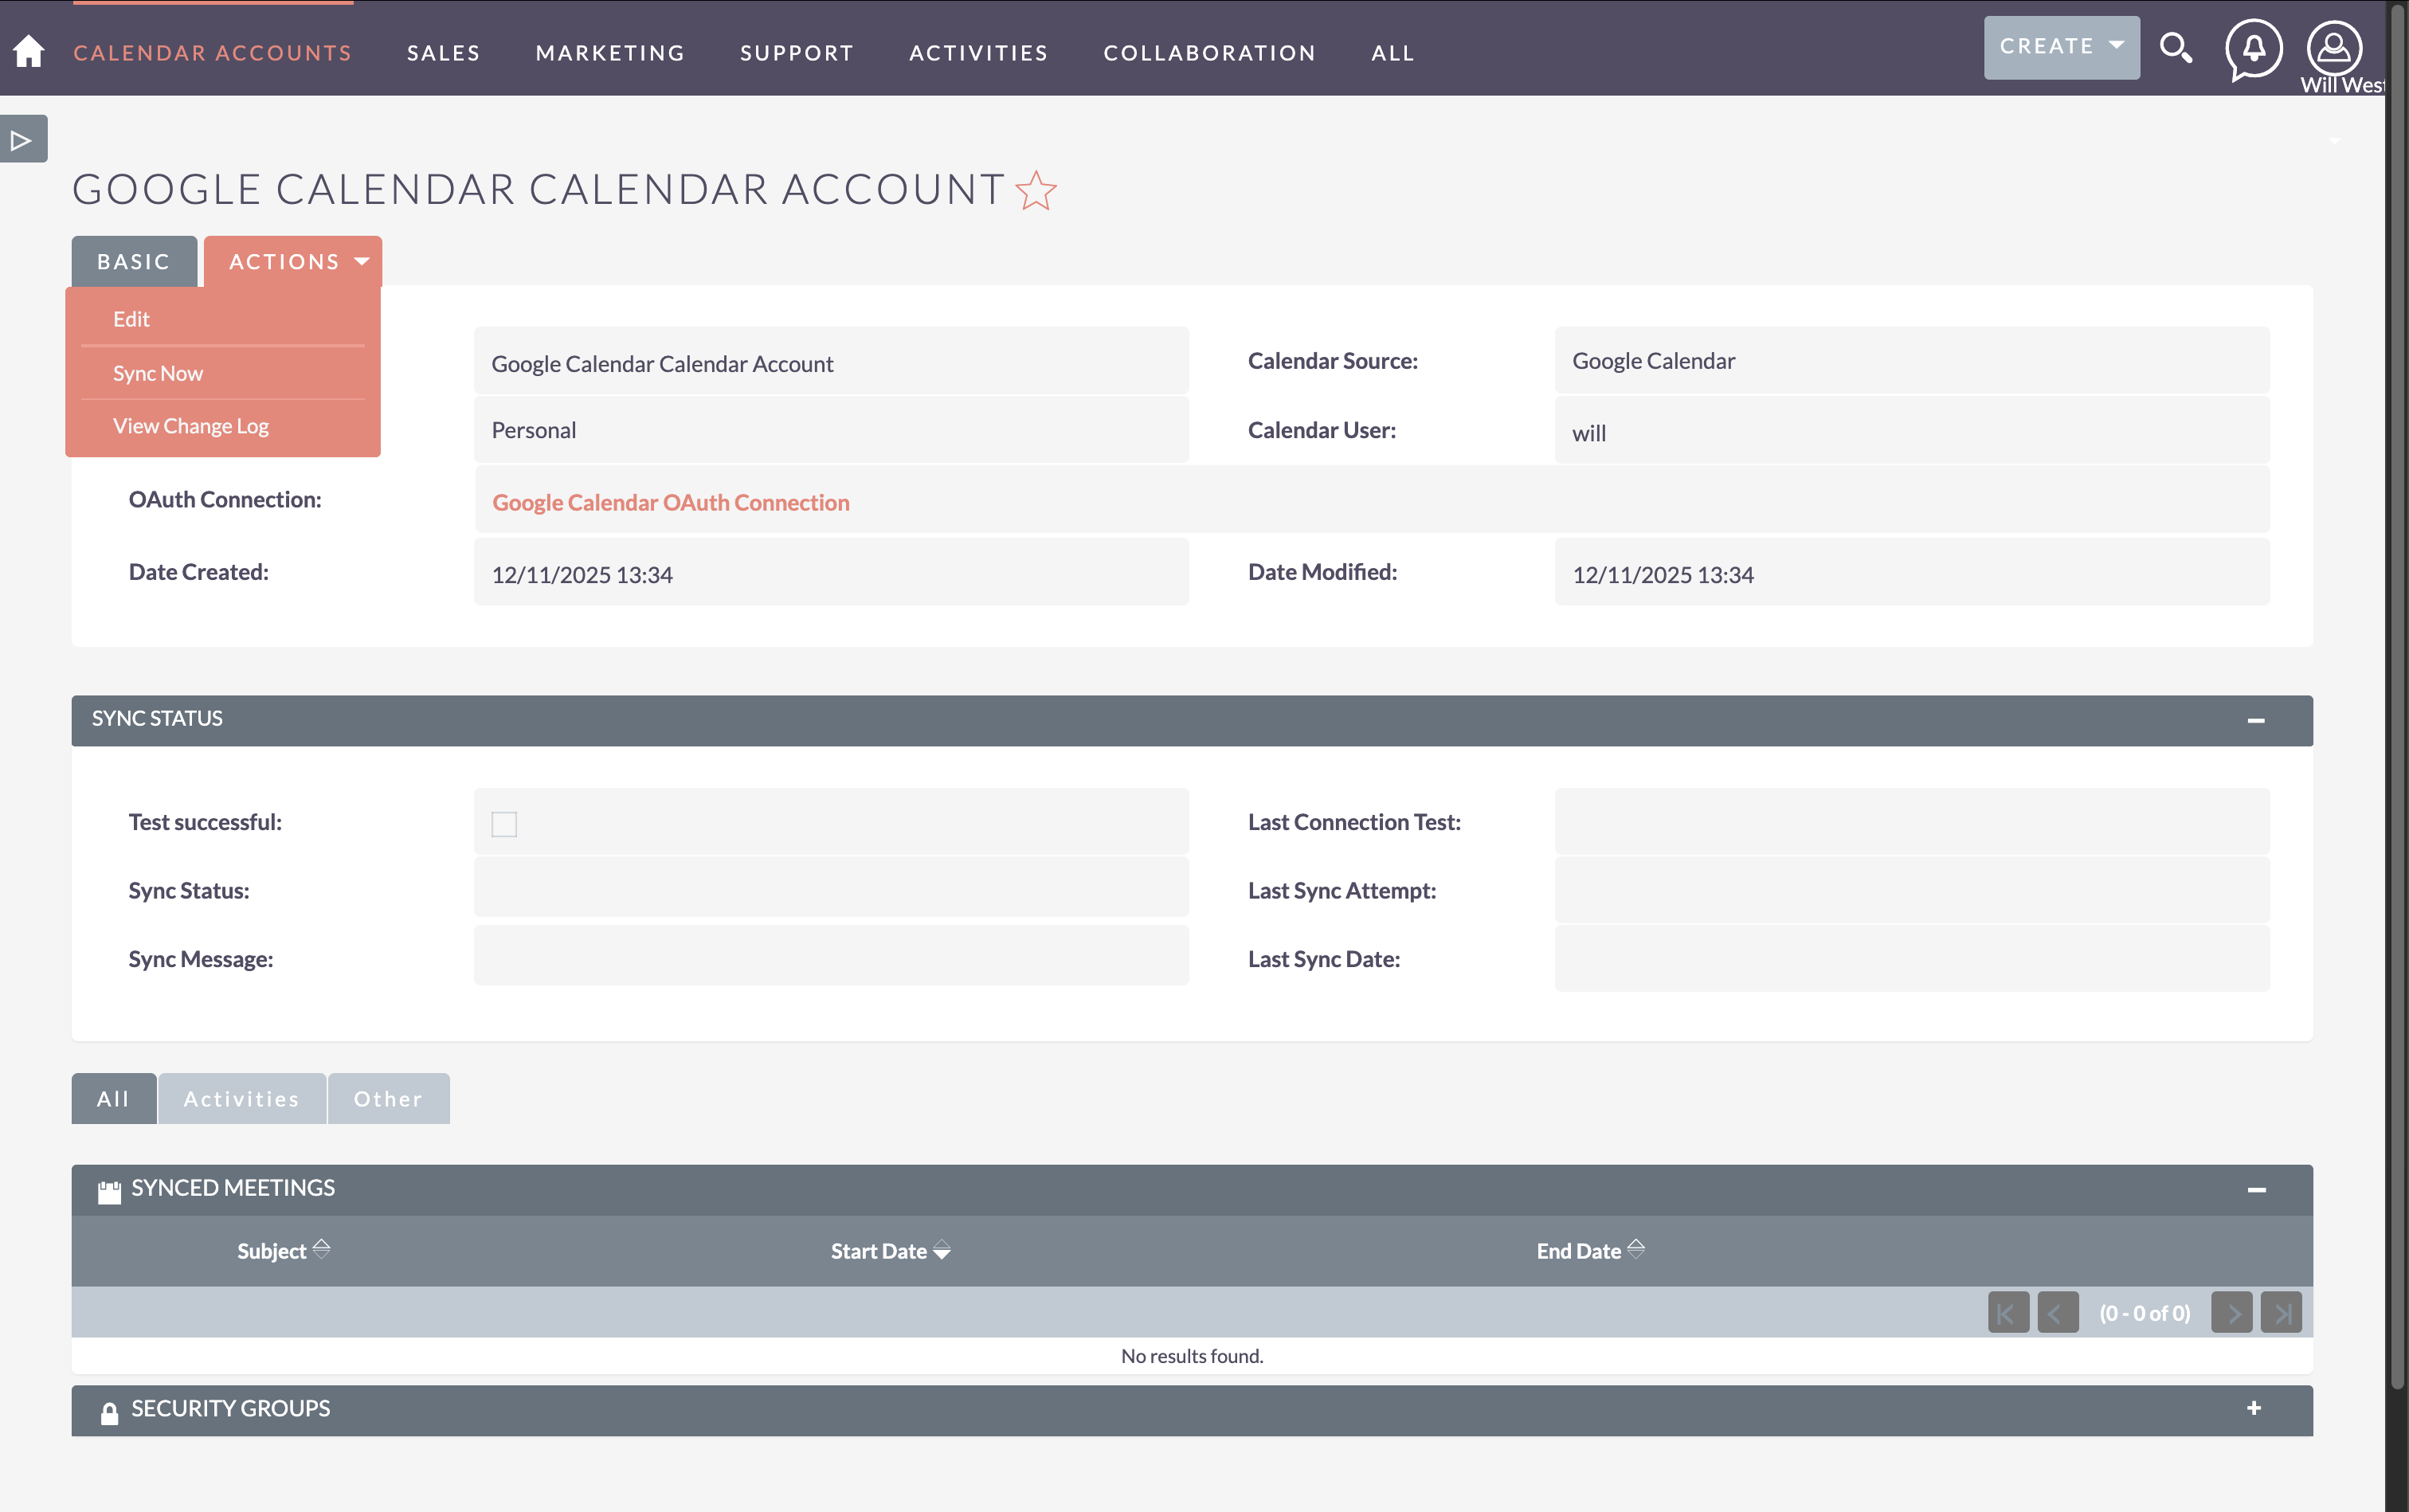
Sync Status Fields
Your Calendar Account displays several read-only status fields in the Sync Status panel that help you monitor synchronization:
-
Test Successful: Checkbox indicating whether the last connection test passed
-
Last Connection Test: Timestamp when you last clicked Test Connection
-
Sync Status: Current sync state (In Progress, Success, Warning, or Error)
-
Sync Message: Details about the last sync result (e.g., "No new meetings to sync.")
-
Last Sync Attempt: Timestamp when synchronization was last attempted
-
Last Sync Date: Timestamp when synchronization last completed successfully
These fields update automatically and help you troubleshoot synchronization issues:
-
If Sync Status shows "Failed", check the Sync Message for details
-
If Last Sync Date is not updating, check that the scheduler is running and the sync job is active
You can view these fields in the detail view of your Calendar Account.
Viewing Synced Meetings
Your Calendar Account includes a Synced Meetings subpanel showing all SuiteCRM meetings linked to events in your external calendar.
This subpanel helps you:
-
Track Synchronized Meetings: See which SuiteCRM meetings correspond to external calendar events
-
Verify Synchronization: Confirm that meetings are syncing as expected
-
Audit Calendar Activity: Review which meetings are connected to your external calendar
The subpanel displays standard meeting fields:
-
Meeting subject/name
-
Start date and time
Clicking a meeting in the subpanel opens the full meeting record where you can view additional details and make changes. Any changes you make to the meeting in SuiteCRM will sync to your external calendar during the next sync run.
If a meeting appears in your external calendar but not in the Synced Meetings subpanel, trigger a manual sync using the Sync Now button to pull the latest events from the external calendar.
What Happens After Setup
Once your Calendar Account is configured and tested:
-
Automatic Synchronization: The scheduler runs at the configured interval (typically every 15 minutes) and syncs your calendar
-
Bidirectional Changes: Meetings created or modified in SuiteCRM sync to your external calendar, and vice versa
-
Conflict Resolution: If the same meeting is changed in both systems, the configured conflict resolution strategy determines which version wins
-
Continuous Monitoring: The Last Sync Date updates each time synchronization runs for your account
You don’t need to take any further action - synchronization runs automatically as long as the scheduler is active and your Calendar Account remains configured.
Managing Your Calendar Account
You can manage your Calendar Account at any time:
Editing Your Account
-
Navigate to your Calendar Account detail view
-
Click Edit
-
Modify fields as needed (name, credentials, etc.)
-
Click Save
-
Click Test Connection to verify changes
-
Click Save again to preserve the test result
Re-authorizing OAuth
If your Google OAuth token expires or is revoked:
-
Edit your Calendar Account
-
Click Authenticate to restart the OAuth flow
-
Complete the Google authorization in the popup
-
Click Save and test the connection
Next Steps
Now that your calendar is connected:
-
Review Understanding Sync & Troubleshooting to learn how synchronization works
-
See CalDAV Provider Guide if you need to find or verify your CalDAV URL
-
Contact your administrator if you experience issues with OAuth configuration or scheduler setup
Changes to global sync settings (conflict resolution, sync window) are controlled by your administrator in Administrator Setup. If you need adjustments to these settings, contact your administrator.