Leads
In SuiteCRM a Lead is an unqualified contact usually generated from some form of marketing related event, for example it could be a person that has filled out a form on your website or someone that you met at a trade show and you are not sure yet if they have buying authority. Once a Lead is qualified and converted then it can be split into three parts; a Contact once you have established 'Who' it is, an Account when you know 'Where' they work and an Opportunity once it is known 'What' they might buy.
Leads Actions
You can access the Leads actions from the Leads module menu drop down or via the Sidebar. The Leads actions are as follows:
-
Create Lead – A new form is opened in Edit View to allow you to create a new Account record.
-
View Leads – Redirects you to the List View for the Leads module. This allows you to search and list Lead records.
-
Import Leads – Redirects you to the Import Wizard for the Leads module. For more information, see Importing Records.
To view the full list of fields available when creating a Lead, See Leads Field List.
Managing Leads
-
To sort records on the Leads List View, click any column title which is sortable. This will sort the column either ascending or descending.
-
To search for a Leads, see the Search section of this user guide.
-
To update some or all the Leads on the List View, use the Mass Update panel as described in the Mass Updating Records section of this user guide.
-
To duplicate a Lead, you can click the Duplicate button on the Detail View and then save the duplicate record.
-
To merge duplicate Leads, select the records from the Leads List View, click the Merge link in the Actions drop-down list, and progress through the merge process. For more information on Merging Duplicates, see the Merging Records section of this user guide.
-
To delete one or multiple Leads, you can select multiple records from the List View and click delete. you can also delete a Lead from the Detail View by clicking the Delete button. For a more detailed guide on deleting records, see the Deleting Records section of this user guide.
-
To view the details of a Lead, click the Lead Name in the List View. This will open the record in Detail View.
-
To edit the Lead details, click Edit icon within the List View or click the edit button on the Detail View, make the necessary changes, and click Save.
-
For a detailed guide on importing and exporting Leads, see the Importing Records and Exporting Records sections of this user guide.
-
To track all changes to audited fields, in the Lead record, you can click the View Change Log button on the Lead Detail View or Edit View.
Converting a Lead
Once enough information is gathered about a Lead, then the Lead can be progressed to the next Sales stage and the Lead can be converted into a Contact, Account and Opportunity. The way in which a Lead is converted depends on how the System Administrator has set up SuiteCRM. To convert a Lead with the default SuiteCRM setup you have to click on an individual Lead record to access the Detail View of the Lead and click on the arrow next to the Other button, then click on 'Convert Lead' from the drop-down menu shown in the image below:
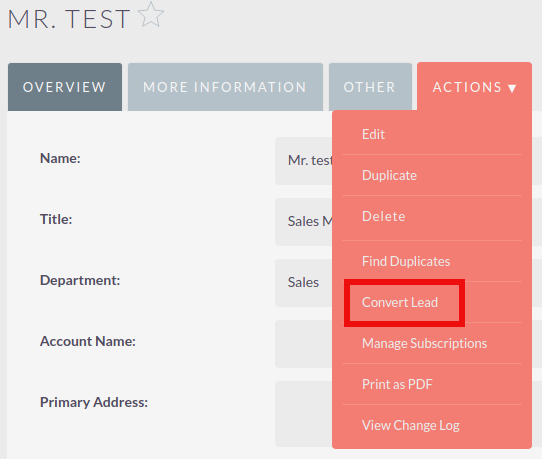
Once you have clicked on 'Convert Lead' button then you will be taken to the Convert Lead page.
Convert Lead to Contact
On this page you will be able to Create or Select Contact:
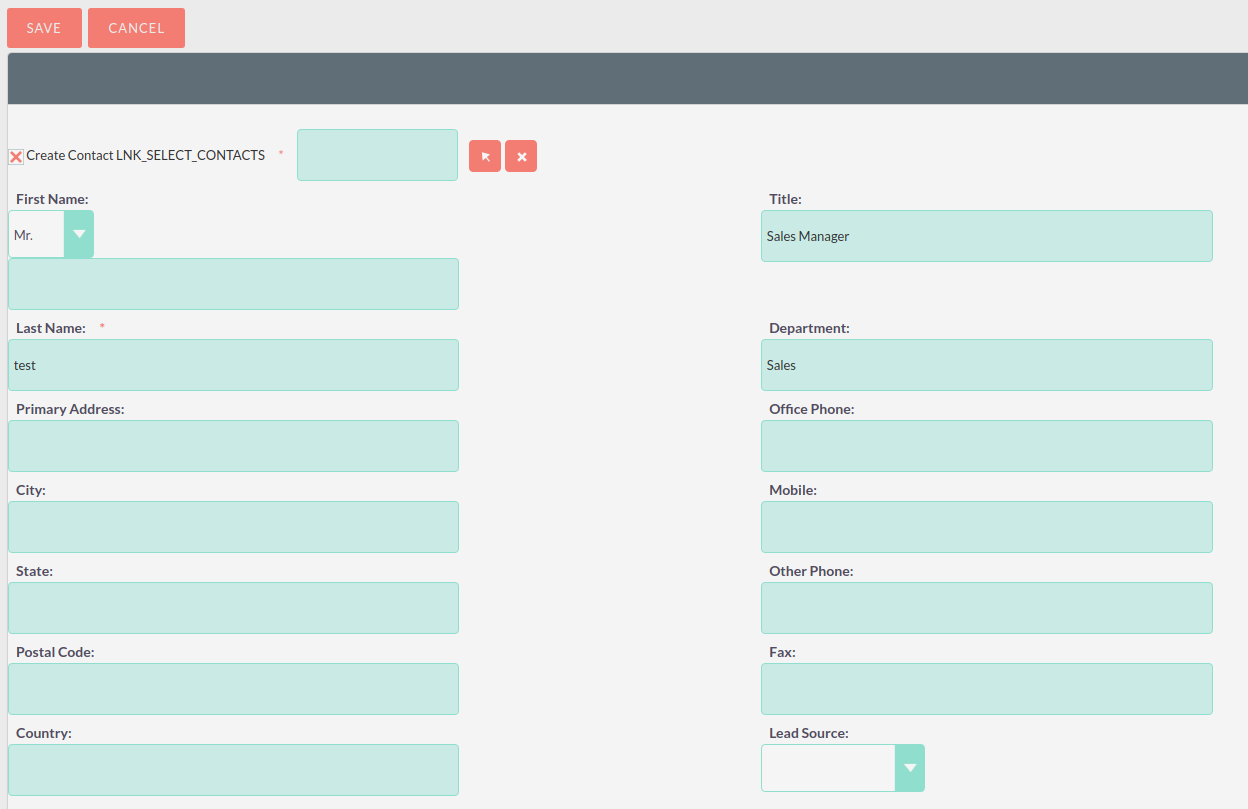
By deselecting the checkbox next to 'Create Contact' you will be able to associate the Lead to an existing Contact. However, in most cases when converting a Lead there will be no existing Contact. Make sure the Create Contact checkbox is selected. Some of the fields will automatically be populated using the Lead information. Fill out the remaining relevant fields and move to the next Stage below:
Convert Lead to Account
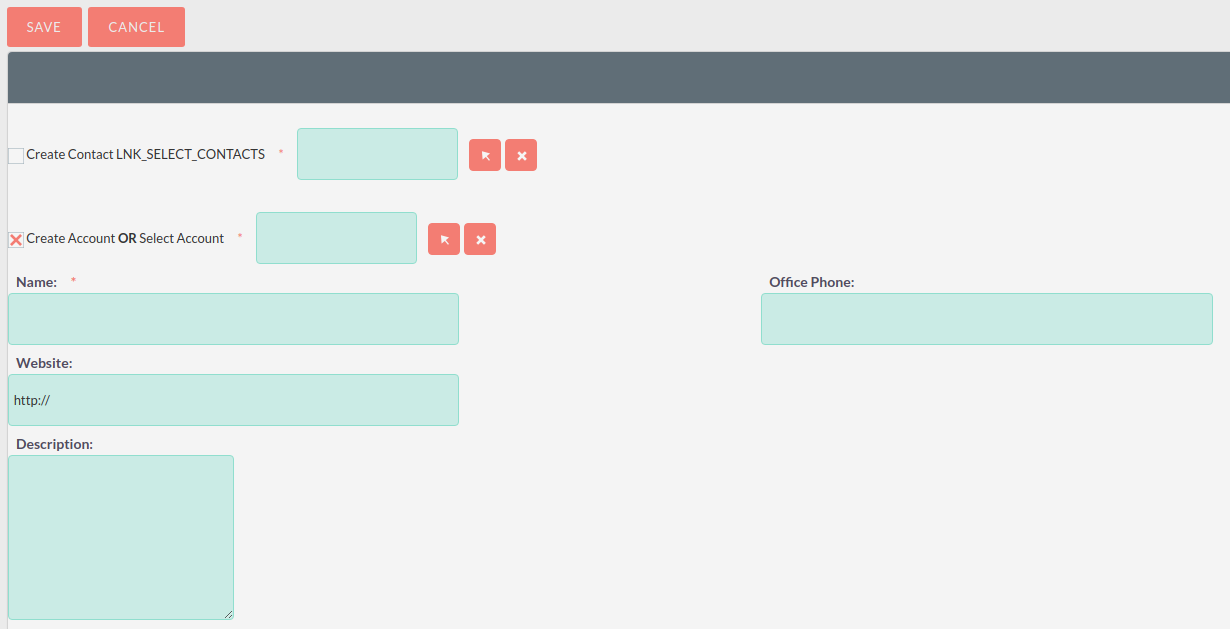
To create an Account from a converted Lead you will follow the same process as with a Contact, some information will populate from the Lead automatically, just complete the rest.
Convert Lead to Opportunity
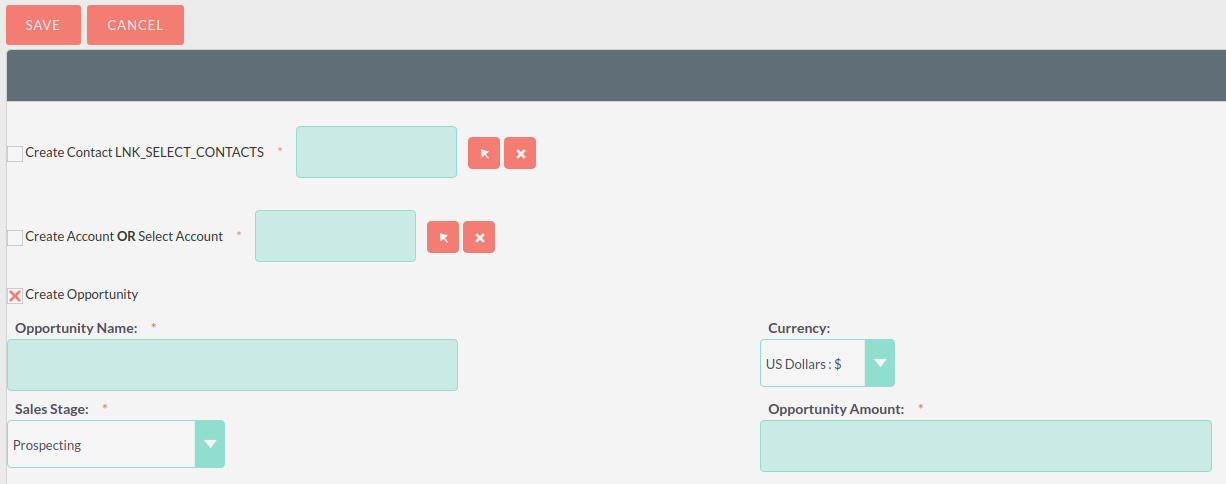
To create an Opportunity from a converted Lead you will follow the same process as with a Contact, some information will populate from the Lead automatically, just complete the rest.
Other Lead Conversion Options
Other records can be created when converting a Lead in the same way as Contacts/Accounts and Opportunities.
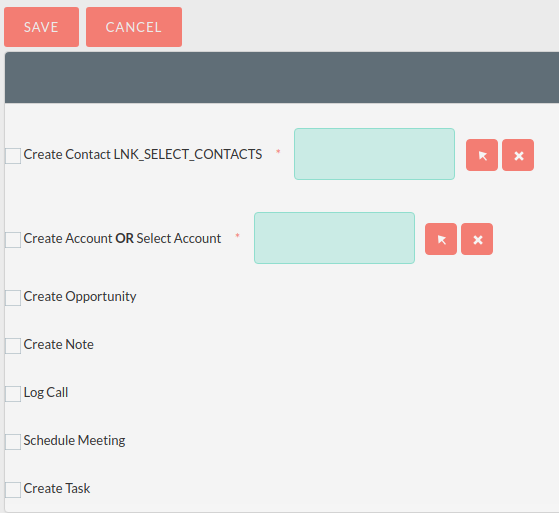
After you have completed the relevant sections click Save to confirm the changes.
Duplicate Record Check
When converting a Lead SuiteCRM will automatically check for any duplicate records and will return a warning if a matching record is found.

If you find that the duplicate warning is not valid and you still wish to create a new record, then click Create. Otherwise if you decide that the warning is correct and the record does already exist in the CRM then you should the 'select' button.